Create multi-arch Docker images for Docker
Docker has been supporting multiple processor architecture for a long time - including x86_64 and ARMv6/7 being the most well-known ones. In addition to them, aarch64/arm64 (ARMv8+), s390x (IBM z Systems) and ppc64le (IBM POWER) are also possible.
Images can be created for multiple architectures in a parallel manner and uploaded to Docker Hub - if you keep some intermediate steps in mind.
Dockerfile
One way to create images is the Dockerfile - a simple text file that creates a new image on the basis of an existing one. Basically, this is the common procedure - creating a "naked" image that contains both the operating system and the application from scratch is way more time-consuming.
Most current images are based on the minimalistic, security-oriented distribution Alpine Linux.
Here is an example of a Python web application:
 1FROM alpine:3.11
 2MAINTAINER pinkepank@foo.bar
 3
 4# add base and community repositories
 5ADD repositories /etc/apk/repositories
 6RUN apk add --update python3 py3-pip@community
 7
 8# install dependencies
 9RUN pip3 install flask
10
11# create application directory
12RUN mkdir -p /opt/joke_api/joke_api
13ADD joke_api /opt/joke_api/joke_api
14ADD entrypoint.sh /opt/joke_api/entrypoint.sh
15
16# volume configuration
17VOLUME ["/opt/joke_api/instance"]
18
19# start application
20CMD "/opt/joke_api/entrypoint.sh"
21
22# listen on port 5000
23EXPOSE 5000
The first line (FROM) defines the parent image, the new image is based on, MAINTAINER defines a developer. Lines starting with ADD add local files to the image, for example application and configuration files. Lines beginning with RUN contain command lines that are executed in the container during image creation. Directories marked with VOLUME can be manipulated outside the container - this is typically used for application data directories or databases. If the container is running an application that needs to be accessible externally, the appropriate port needs to be defined with EXPOSE.
The image is created using the docker build command. In this example, the tag name was set to joke_api:
 1$ docker build -t joke_api .
 2Step 1/11 : FROM alpine:3.11
 3---> a187dde48cd2
 4Step 2/11 : MAINTAINER pinkepank@foo.bar
 5---> fede7d8c01e5
 6Step 3/11 : ADD repositories /etc/apk/repositories
 7...
 8Step 4/11 : RUN apk add --update python3 py3-pip@community
 9...
10Step 5/11 : RUN pip3 install flask
11Step 6/11 : RUN mkdir -p /opt/joke_api/joke_api
12Step 7/11 : ADD joke_api /opt/joke_api/joke_api
13Step 8/11 : ADD entrypoint.sh /opt/joke_api/entrypoint.sh
14Step 9/11 : VOLUME ["/opt/joke_api/instance"]
15Step 10/11 : CMD "/opt/joke_api/entrypoint.sh"
16Step 11/11 : EXPOSE 5000
17Successfully built a7177d5042c1
Before the image is tagged and uploaded to Docker Hub, an account needs to be created - if not done, yet. Login on the command-line:
1$ docker login -u <username>
In preparation, create a new image repository on Docker Hub. Basically, Docker differentiates between public and private repositories. While there is no limit for public repositories, every user has only one private repository.
Afterwards, the image created previously can be tagged and uploaded. This is done with the following two commands:
1$ docker tag local-image:tag-name remote-repo:tag-name
2$ docker push remote-repo:tag-name
Regarding tags it is safe to say that the following rules seems to have came out on top:
- latest - latest version, also non-stable releases are possible
- edge, devel - development versions
- stable - versions released for production usage
- 3.11, 3.1, 3 - major and minor versions
- alpine, bionic - (varying) base images
- amd64, armv6 - (varying) processor architectures
Of course, these fragments can also be combined - e.g. devel-bionic and alpine-latest would be meaningful tags. Even if it is not considered safe to use latest tagged images in production, it is basically a good idea to tag the latest version of your image with this tag. Otherwise, users won't be able to download the latest version if they use the following command:
1$ docker pull username/repository
In an frequent project with active development, it is basically a good idea the use tags for major and minor versions and mark production-ready versions. Images can also be tagged multiple times - so an image can be both latest and stable.
Let's focus on the example - in my case the following commands were necessary to upload the local directory:
1$ docker tag joke_api stdevel/joke-api:latest
2$ docker push stdevel/joke-api:latest
After finishing the upload, the image is immediately online and can be downloaded from the Docker Hub website.
Docker Hub Automated Builds
To avoid having to update images manually after every code change, Docker offers a small CI/CD pipeline called Automated Build. This pipeline can trigger a build after updating the code if this code is hosted on GitHub or BitBucket. For this, linking the appropriate accounts is required - the appropriate settings can be found in the profile area on Docker Hub.
In the repository settings, move to Builds > Configure Automated Builds to open a dialog that also defines build rules. These rules can include particular branches and assign them to Docker tags - by default, the master branch is assigned to the latest tag:
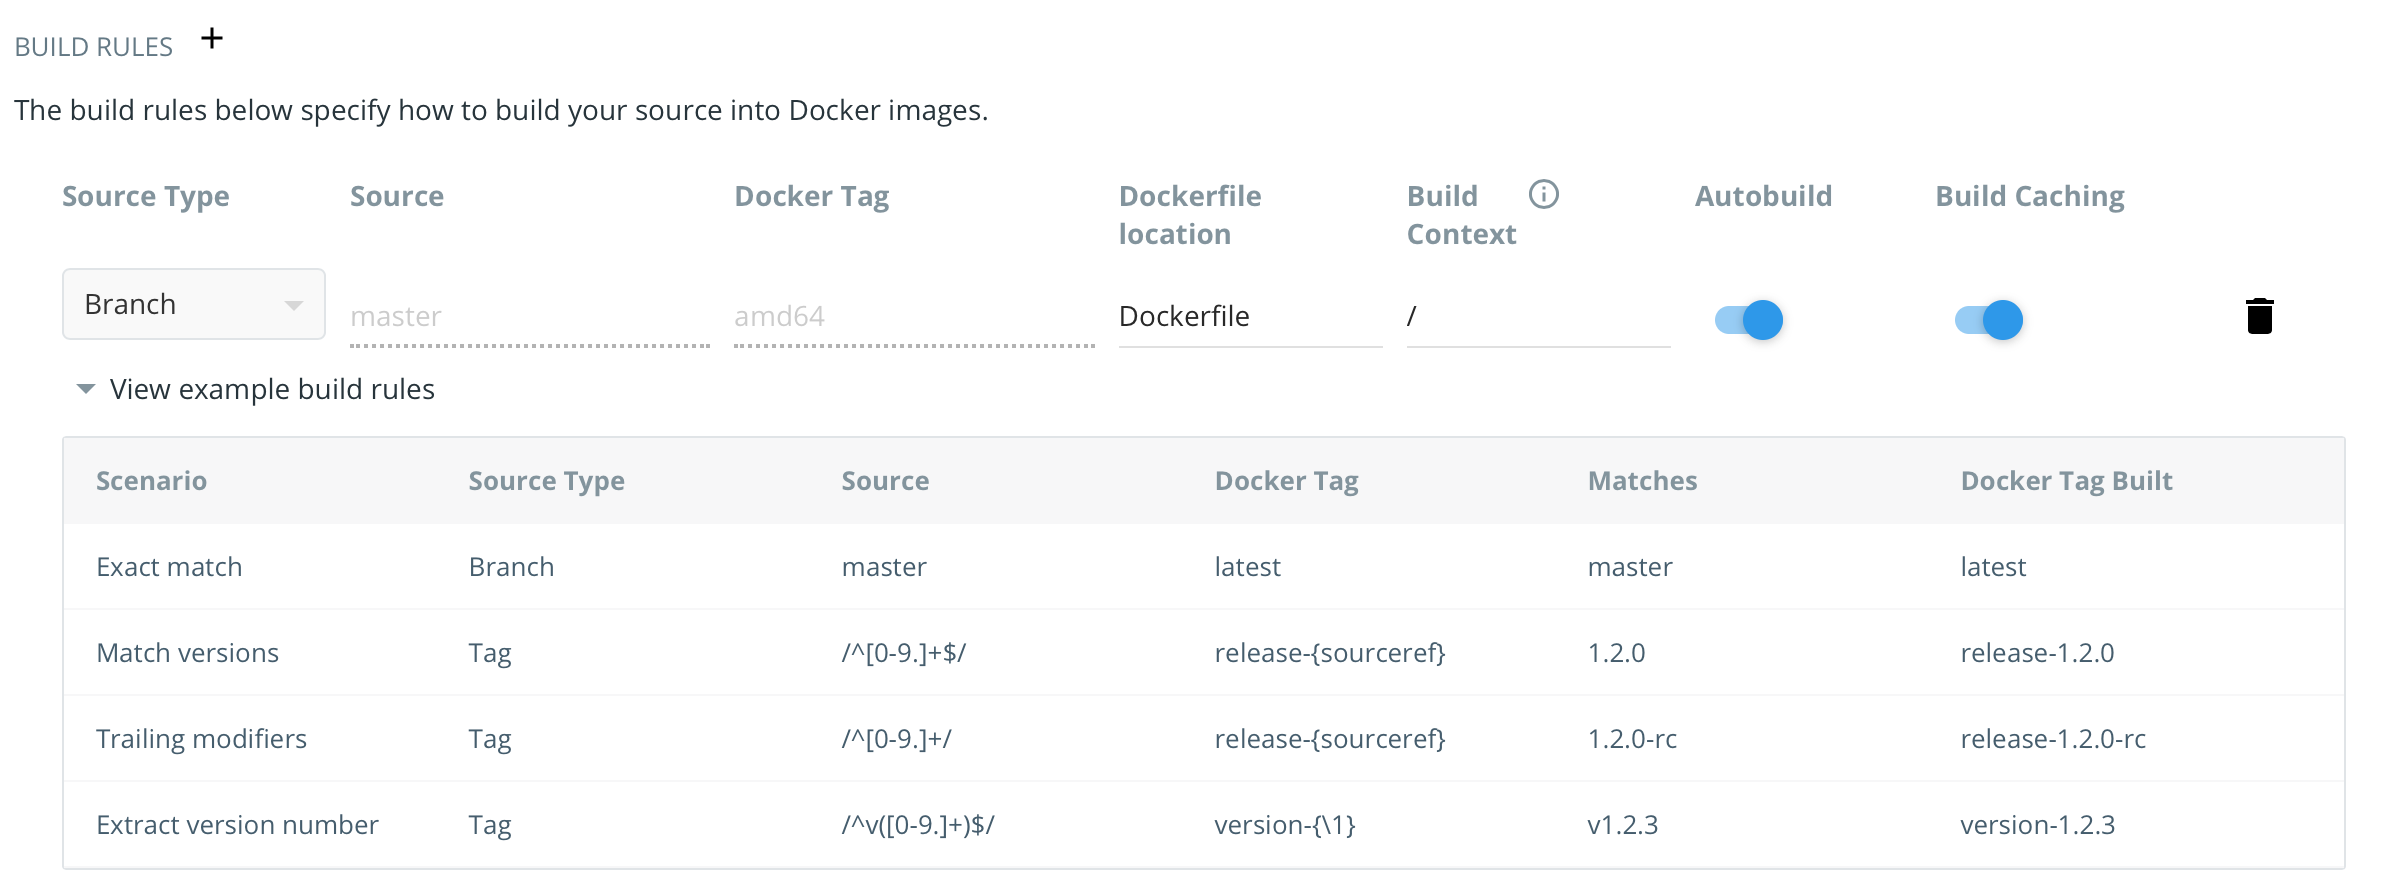
After clicking Save and Build , settings are stored and the first build is started immediately.
After some minutes, it figures out that the image uploaded previously has been overwritten - even though it was made for another architecture.
Manifest
This is where manifests are coming into picture. They are responsible for assigning multiple architecture images to a single tag. The advantage is that - for example - both x86_64 and ARM users can leverage the same docker pull command without having to lookup the appropriate image before downloading.
For this, a Docker installation with the appropriate command-line tools is necessary - I can't get behind why these settings are not available to the web interface. The tool configuration file can be found at ~/.docker/config.json - it needs to be extended with the following setting:
1{
2...
3  "experimental": "enabled"
4}
Afterwards, a manifest is created and uploaded for a specific tag:
1$ docker manifest create stdevel/joke-api:latest stdevel/joke-api:amd64 stdevel/joke-api:arm
2$ docker manifest push --purge stdevel/joke-api:latest
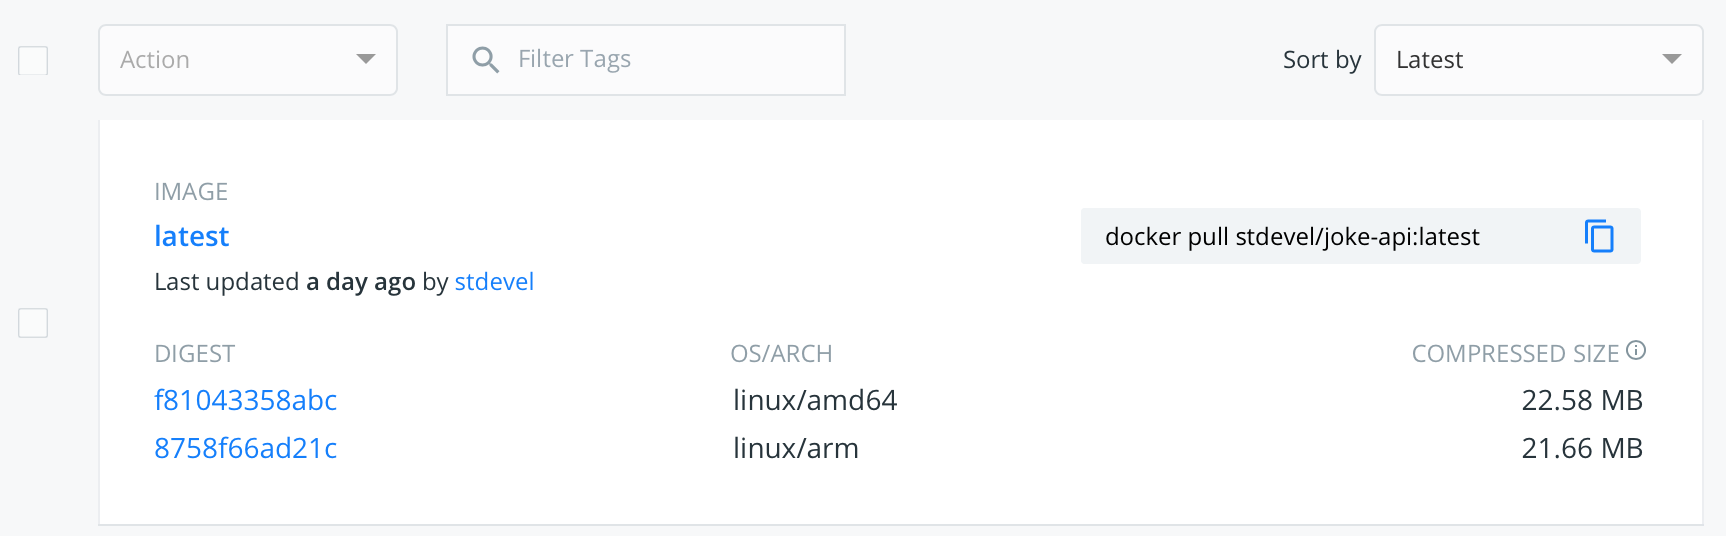
During the next builds/uploads, images are not overwritten anymore:
Conclusion
I'm using Docker Hub Automated Builds for automated x86_64 builds with a dedicated tag (amd64) - other platforms are (currently) not supported. Feel free to ping me if I missed something here. 🙂
Additional builds for the ARM architecture are created locally and uploaded semi-automated using a script. A nicer solution would be creating and uploading both images using a local CI/CD pipeline - e.g. using GitLab.