GitLab Continuous Integration
With the new major version 8, GitLab was extended to include a continuous integration (CI) component that was developed as dedicated project until now. While it was necessary to utilize external solutions, such as Jenkins, previously, it it now possible to automatically compile and test managed projects easily.
But, what is CI used for? CI is mainly used for professional development purposes for automating sub-steps for compiling and enhancing source code quality. To name some real-world examples:
- Compiling sub programs
- Assembling the total software
- Testing sub programs on the basis of specifications (test units)
- File replication to other systems (e_.g. other development systems_)
Although CI integrates into version control systems to refer to commits or handle recent code changes.
Until now, I was using GitLab in combination with Jenkins to automate building RPM packages for multiple Enterprise Linux architectures and versions. As far as I can evaluate (I'm not a developer), Jenkins offers more flexibility and functionality than GitLab CI - but is also way more complex to configure. During the implementation of my setup, I had to look up a couple of things. GitLab CI is simple but also might not fit all customer's needs; for my scenario it is definitely a better choice. I implemented and tested the following concept in just within a couple of hours.
The most CI solutions utilize appropriate agents or runners on build systems for controlling the particular processes (compiling code, replicate files,...). While Jenkins uses a Java application, GitLab CI offers multiple runners.
Preparations
To use GitLab CI, you need to run GitLab version 8.0 or higher. The feature is enabled and configured on a per project basis. For controlling the particular processes, a simple YAML file named .gitlab-ci.yml in the project root directory is used - we will focus on this later.
Project settings
To enable CI for a GitLab project, perform the following steps:

- Select the project and click Settings and Project Settings.
- Click Builds and Save Changes.
- Select CI Settings to set advanced parameters including timeouts and automatic build.
- Click Save Changes.
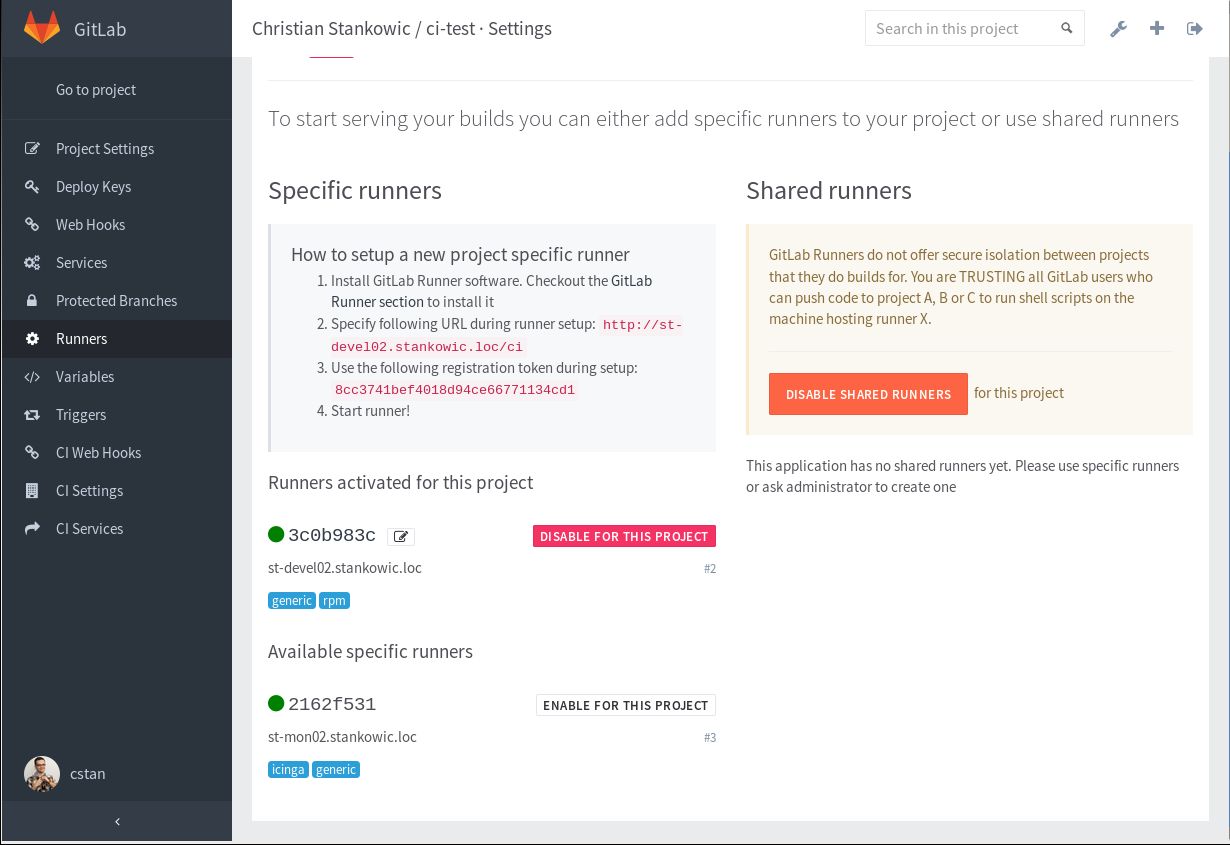
- Select Runners. Note or copy the CI URL and the CI token. We will need these information later to register runners.
For controlling the particular steps on the runners, the YAML configuration needs to be created. In this file, we will configure sub steps, scripts and possible dependencies to particular runners by specifying tags.
A simple example looks like this:
 1before_script:
 2  - hostname
 3
 4build:
 5  script:
 6    - "javac *.java"
 7
 8clean:
 9  script:
10    - "find . -type f -name '*.tmp' -exec rm {} ;"
In this example, two jobs are defined:
build- script for compiling all java source code in the current directoryclean- removing all files ending with.tmp
Before running the jobs, the hostname command is executed. The job is executed on a random system from the runner pool available to the project. By specifying tags, it is possible to restrict this behavior:
 1before_script:
 2  - hostname
 3
 4build_stable_jars:
 5  script:
 6    - "javac *.java"
 7  tags:
 8    - java
 9  only:
10    - master
11
12build_hipster_swag:
13  script:
14    - "bundle exec swag"
In this example, there are again two jobs:
build_stable_jars- compiling java source code form the repositorymasterbranch; only executed on runners with thejavatagbuild_hipster_swag- packaging ruby applications; can be executed on all runners, not limited to a particular branch
On the GitLab website, there are more examples.
Runner settings
It is recommended to use a dedicated system user for the runner application. It is necessary to set a password and also create a SSH key for this user. During the key creation it is important not to specify a passphrase to ensure management without a password. These information will be assigned to GitLab to enable controlling the runner:
1# useradd --comment "GitLab service user" --system -m su-gitlab-ci
2# passwd su-gitlab-ci
3# su - su-gitlab-ci
4$ ssh-keygen
For GitLab CI, there are multiple clients available. Beside the official client written in Go, there are also Scala/Java and Node implementations.
I decided to go for the official client. Beside Windows, OS X and FreeBSD, this client also supports distributions based on Debian and Red Hat Enterprise Linux. Alternatively, there are also independent binary packages. For supported Linux distributions, GitLab recommends using a script for automatically configuring the software repositories. I decided to configure this on my own and used the following URLs for the repositories:
| Release/architecture | URL |
|---|---|
| Enterprise Linux 7, x86_64 | https://packages.gitlab.com/runner/gitlab-ci-multi-runner/el/7/x86_64 |
| Enterprise Linux 6, x86_64 | https://packages.gitlab.com/runner/gitlab-ci-multi-runner/el/6/x86_64 |
| Enterprise Linux 6, i686 | https://packages.gitlab.com/runner/gitlab-ci-multi-runner/el/6/i686 |
| Fedora 23, x86_64 | https://packages.gitlab.com/runner/gitlab-ci-multi-runner/fedora/23/x86_64 |
| Fedora 23, i686 | https://packages.gitlab.com/runner/gitlab-ci-multi-runner/fedora/23/i686 |
| Fedora 22, x86_64 | https://packages.gitlab.com/runner/gitlab-ci-multi-runner/fedora/22/x86_64 |
| Fedora 22, i686 | https://packages.gitlab.com/runner/gitlab-ci-multi-runner/fedora/22/i686 |
The GPG key used for signing the packages can be reached at https://packages.gitlab.com/gpg.key.
For installing the packages, the following Yum command is sufficient:
1# yum install gitlab-ci-multi-runner
After all runners have been installed, they need to be registered with GitLab. For this, the gitlab-runner command is executed on the build system. While configuration, the CI URL and the appropriate token is specified. Beside this, it is also possible to assign tags on a per system basis. Especially for projects that are built on different systems (e.g. creating RPM packages) this is very useful. For controlling the runner, local shells, SSH, Parallels (for VMs) or Docker can be used. When using SSH, valid login information and the SSH key created previously needs to be entered.
 1# sudo gitlab-runner register
 2 Please enter the gitlab-ci coordinator URL (e.g. https://gitlab.com/ci):
 3 http://gitlab.localdomain.loc/ci
 4 Please enter the gitlab-ci token for this runner:
 5 xxx
 6 Please enter the gitlab-ci description for this runner:
 7 [gitlab.localdomain.loc]:
 8 Please enter the gitlab-ci tags for this runner (comma separated):
 9 rpm764,generic
10 INFO[0035] 7ab95543 Registering runner... succeeded
11 Please enter the executor: ssh, shell, parallels, docker, docker-ssh:
12 ssh
13 Please enter the SSH server address (eg. my.server.com):
14 gitlab.localdomain.loc
15 Please enter the SSH server port (eg. 22):
16 22
17 Please enter the SSH user (eg. root):
18 su-gitlab-ci
19 Please enter the SSH password (eg. docker.io):
20 myPassword
21 Please enter path to SSH identity file (eg. /home/user/.ssh/id_rsa):
22 /home/su-gitlab-ci/.ssh/id_rsa
23 INFO[0143] Runner registered successfully. Feel free to start it, but if it's running already the config should be automatically reloaded!
The first build
Let's start with something simple. As example, we're using a simple tiny C application named test.c:
1#include<stdio.h>
2
3int main() {
4    printf("GitLab CI rocks!n");
5    return 0;
6}
The CI configuration file .gitlab-ci.yml looks like this:
1build:
2  script:
3    - "rm *.out || true"
4    - "gcc *.c"
In this example, a job called build running two commands is defined. The first command removes previously crated binary programs, while the second call compiles the source code.
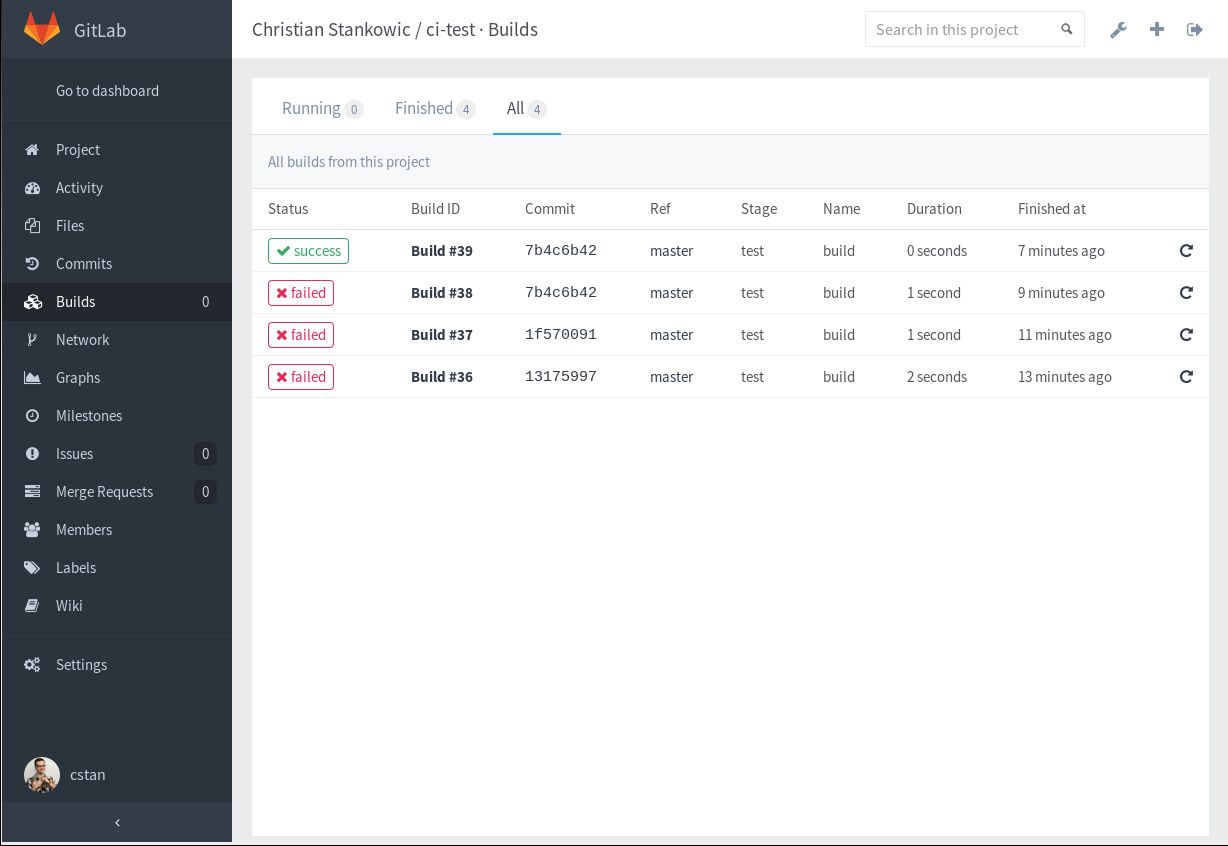
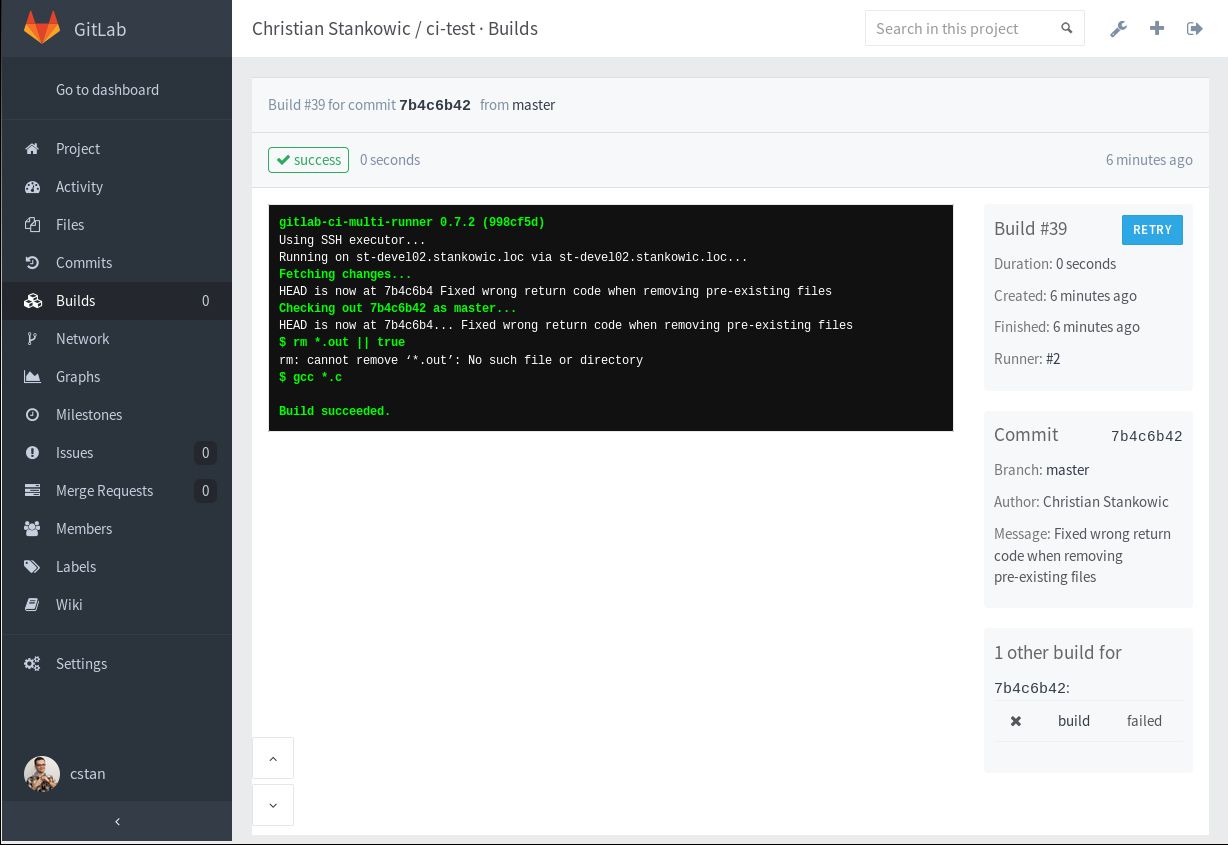
After a commit, the CI is triggered automatically. This can be seen in the Builds menu on the left. In the ideal case, you can spot the number 1 here (for one current running build process). Clicking the menu will open a list of current and old builds. Clicking a single build will show up console outputs and Git information (Commit number, branch, author) anzeigen. Builds can easily be repeated by clicking the appropriate icon.
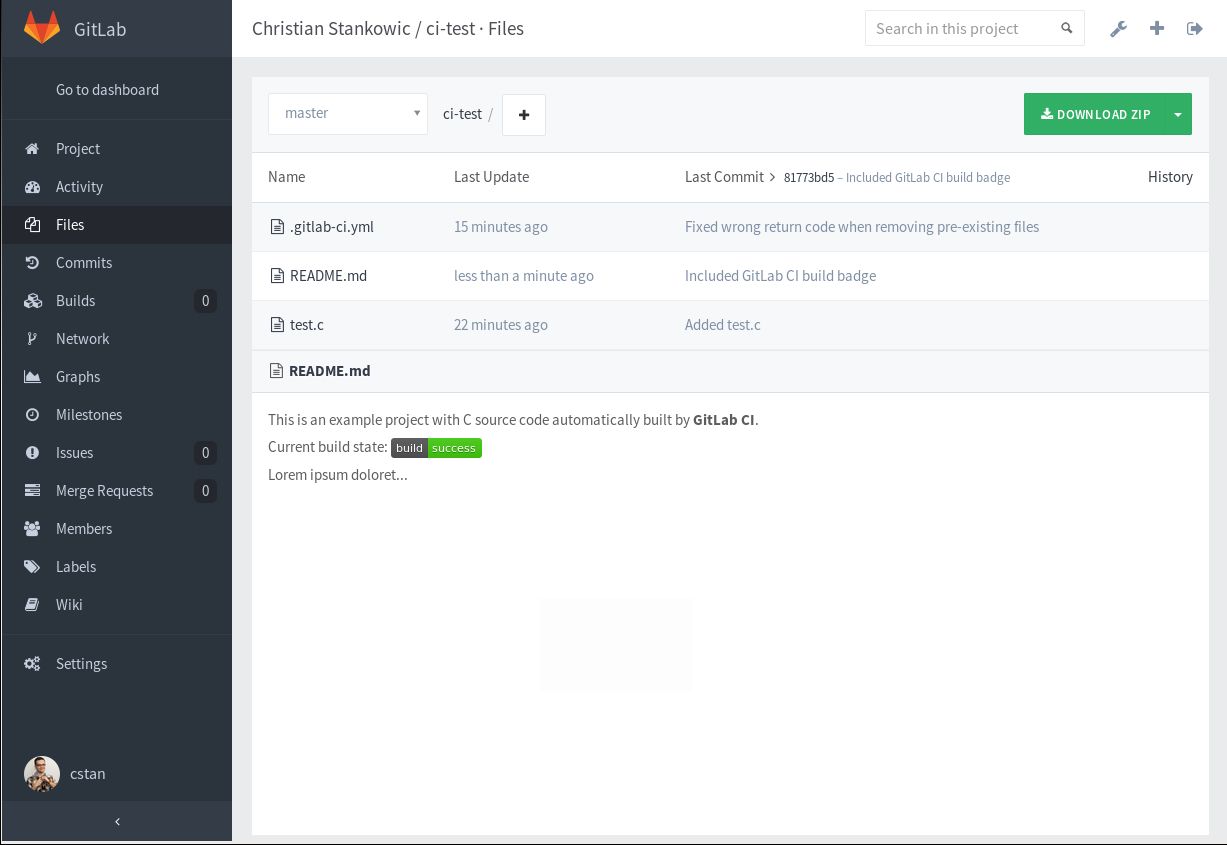
GitLab also offers the possibility to run builds time-controlled - e.g. at least all 5 hours. In this case, builds are triggered after a specific time frame if no commit is recognized. This behavior can be configured in the project settings in the CI Settings pane (Build Schedule). In this dialog a build status image (Status badge) can be found; it is a common procedure to include this image into the README.md file of the repository to always see the recent build state.


Conclusion
I really appreciate this solution; with Jenkins I often stumbled upon issues - not least because of Java. I often had to install updated and reconfigure things to fix them. GitLab CI integrates very well in the user interface that I already use for development. For me, this reduces administration and maintenance effort a lot. Depending on the project, the integrated CI solution might not meet all requirements - for smaller setups it is ideal. I'm really excited to follow further GitLab development. 🙂
Additional information can be found on the GitLab website.