Simple REST application with Python and Flask
Currently I'm spending a lot of time on automating complex application scenarios; during training I also starting learning about creating customized REST applications. The result was a tutorial which covers all stages of developing a small "RESTful" application:
- Concept/Definition
- Development
- Tests and documentation
But, let's start with the basics first...
Crash course: REST in Peace
REST was designed for communicating between application services as lightweight alternative to existing solutions such as SOAP (Simple Object Access Protocol) or WSDL (Web Services Description Language).
One of REST's major characteristics is its stateless design. This means that every single message contains all necessary information making a single request finalized. In other words: REST applications never require to reload essential parameters in additional calls. This stateless design enables better scalability as applications can be spread over multiple servers behind a load balancer. As every message is finalized, subsequent messages can be processed by multiple servers without making any effect for the user.
Usually REST services are presenting data especially in JSON or XML. Those formats are just perfect for integrating into additional "machine-controlled" applications as they can be read and processed automatically very easily. For data transportation, HTTP or HTTPS are used - HTTPS is mostly a better choice as the most REST applications don't implement their own encryption.
Another characteristic of REST is leveraging the KISS principle. Applications should be designed from end to end in an "as easy as possible" manner - beginning with the self-explanatory URI schema, ending up with the amount of parameters. Focus on the minimum of complexity to simplify your application.
For the rest of this article we will focus on a small example - an application that stores user with an unique identifier as well as an user name and a mail address.
URI naming
REST applications utilize simple URIs that summarize their use and also the relationship between resources. It also enables the user to utilize dedicated API versions. Some examples:
| URI | Description |
| http://server/api/user/1234 | Describes a dedicated resource (dedicated user by ID) |
| http://server/api/v2/user/6667 | Describes a dedicated resource and a special API version |
| http://server/api/user | Describes a resource structure without a dedicated element, usually retrieves all the elements (in this example: all users) |
| http://server/api/user/1337/address/2 | Describes a dedicated sub-resource of a dedicated resource (in this example: second address of an user) |
You can remember those URIs easily - and that's how it should not look like:
| URI | Description |
| http://server/api/user/get?id=1234 | Using GET parameters and actions as parameters; kitten will die! |
| http://server/api/?version=2&get=6667 | |
| http://server/api/create?type=user&id=1337&name=paul | |
| http://server/api/action=getaddr&user=1337 |
Calls
URIs can be assigned to multiple purposes as long as they are using different HTTP calls. Some of the calls that are used in :
| Call | Description |
| GET | Retrieves information about a resource |
| POST | Creates a new resource or adds a sub-resource to an existing resource |
| PUT | Updating an existing resource |
| DELETE | Deleting an existing resource |
| PATCH | Updating parts of an existing resource, e.g. a single attribute |
| HEAD | Retrieves header information about a resource - mostly like GET, but without content |
PUT and PATCH look like they are identical at first sight. Let's focus on the example mentioned about. If the mail address of an existing user should be updated, PATCH would be the correct call. If multiple attributes should be updates (e.g. mail address and the username), it would be better to use PUT instead.
Check-out the following website for additional information: [REST API Tutorial].
Flask
Flask is a micro framework for Python for implementing web applications. It is simple to use making it a good choice for small applications like our example. A simple Flask application can be defined in only 5 lines of code:
1from flask import Flask
2app = Flask(__name__)
3
4@app.route("/")
5def hello():
6  return "Hello World!"
In this example, accessing the main site will generate the typical "Hello World" output.
It can be started like this:
1$ ./hello.py
2 * Running on http://localhost:5000/
Alternatively, you can also run the following command:
1$ FLASK_APP=hello.py flask run
2 * Running on http://localhost:5000/
Additional examples can be found in the project documentation.
Example application
Let's focus on our example and REST calls again. Our application needs to implement the following calls:
| URL | Call | Description |
| /api/user/ | POST | Creating an user; parameters supplied in JSON |
| /api/user/<id> | GET | Retrieves user information |
| PUT | Updating an user; parameters supplied in JSON | |
| DELETE | Removing an user |
When creating or updating users, parameters are supplied in JSON: the ID, an username and a mail address. For future purposes it might be a requirement having the possibility for bulk creating/editing users - so handing required parameters separately might not be the best idea. It would be much better to combine required parameters as unique element (item). In a newer application version it would be easy to bundle those items in an array to implement the bulk editing.
A parameter example looks like this:
1{ "item": {"id": 1, "name": "Simone Giertz", "mail": "giertz@shittyrobots.loc"} }
If you prefer tables:
| item | |
| id | 1 |
| name | Simone Giertz |
| giertz@shittyrobots.loc | |
Creating, editing or removing users should be acknowledged with a short message. This message should contain a return code (0 = successful, 1 = not successful) and a short description (SUCCESS or FAILURE). This information can be catched-up by a client application to report status to the user.
Application
First of all - the full source code of this application can be found on my GitHub profile. I can't comment the whole code in this post, I will only focus on some interesting sections as the full source code is documented on GitHub.
For every API call, additional functions are creating and linked to an URI using an Flask route - e.g. for listing an user:
1@app.route("/api/user/<int:user_id>", methods=["GET"])
2def user_show(user_id):
3  """
4  This function shows a particular user.
5  """
6  # return a particular user
7  print("Retrieve user #{}".format(user_id))
8  result = user_get(user_id)
9  return Response(json.dumps(result), mimetype="application/json")
The function user_show() is responsible for displaying the user; it is execute once an GET call (the methods parameter can be used to define HTTP calls the function should be enabled for) to the URL /api/user/ succeeds. In this example it is important the the URL ends with an integer (<int:user_id>) - this integer will be assigned to the user_id variable. The function user_get() will be executed with this variable as parameter; it will retrieve the appropriate user from a SQLite database. Finally, it will return the received information as JSON answer. For this, Flask implements an object type Response, that can be specified using a mime type - application/json is chosen in this example.
Creating users is way more complex - take a look at the code:
 1@app.route("/api/user", methods=["POST"])
 2def user_add():
 3  """
 4  This function creates a new user.
 5  """
 6  # execute and return result
 7  json_data = get_data(request.data)
 8  print("Create user #{}".format(json_data["item"]["name"]))
 9  result = user_create(
10  json_data["item"]["id"], json_data["item"]["name"],
11  json_data["item"]["mail"])
12  return Response(return_result(result), mimetype="application/json")
This function requires the POST call. The function get_data() retrieves transmitted information and deserializes them. Remember - JSON data are objects with additional information that have been "deconstructed" into a JavaScript-conform string. This function is really simple:
 1def get_data(data):
 2  """
 3  This function deserializes an JSON object.
 4
 5  :param data: JSON data
 6  :type data: str
 7  """
 8  json_data = json.loads(data)
 9  print("Deserialized data: {}".format(data))
10  return json_data
So in summary, this function just converts the string back into an object and returns it. Let's go on: after transmitted information have been converted back into an object, it is forwarded to the user_create() function. This function creates the user in the database - the return code can be True (successful) or False (not successful). Finally, this result is forwarded to the return_result() function. This function's purpose is to define return information containing the return code and description depending on the input (True or False):
 1def return_result(result):
 2  """
 3  This function simply returns an operation's status in JSON.
 4
 5  :param result: boolean whether successful
 6  :type result: bool
 7  """
 8  ret = {}
 9  if result:
10    ret["code"] = 0
11    ret["message"] = "SUCCESS"
12  else:
13    ret["code"] = 1
14    ret["message"] = "FAILURE"
15  return json.dumps(ret)
The function returns a dictionary containing the return code and description; it will be returned as JSON answer by Flask.
The full source code on my GitHib profile was also extended by an web interface that can be used for managing users.
Postman
If you need to test API interfaces, Postman is the de facto standard you should use. This highly customizable HTTP client that is available for all major platforms offers a lot of features to simplify generating web server request. To name some examples:
- User-friendly request generation by clicking and selecting required parameters (such as header information, body,...)
- Storing, grouping and documenting requests
- Syntax highlighting
- Automatic testing of whole API workflows
Postman can downloaded for free on the project website.
After we have implemented some API calls, it is a good idea to test them. On GitHub I prepared a Postman catalog that contains the following calls:
| URI | Call | Description |
| /api/user/0 | GET | Listing all users |
| /api/user/1 | GET | Listing an particular user by ID |
| /api/user | POST | Creating a new user (parameters using JSON) |
| /api/user/1 | PUT | Updating an user (parameters using JSON) |
| /api/user/1337 | DELETE | Removing an user by ID |
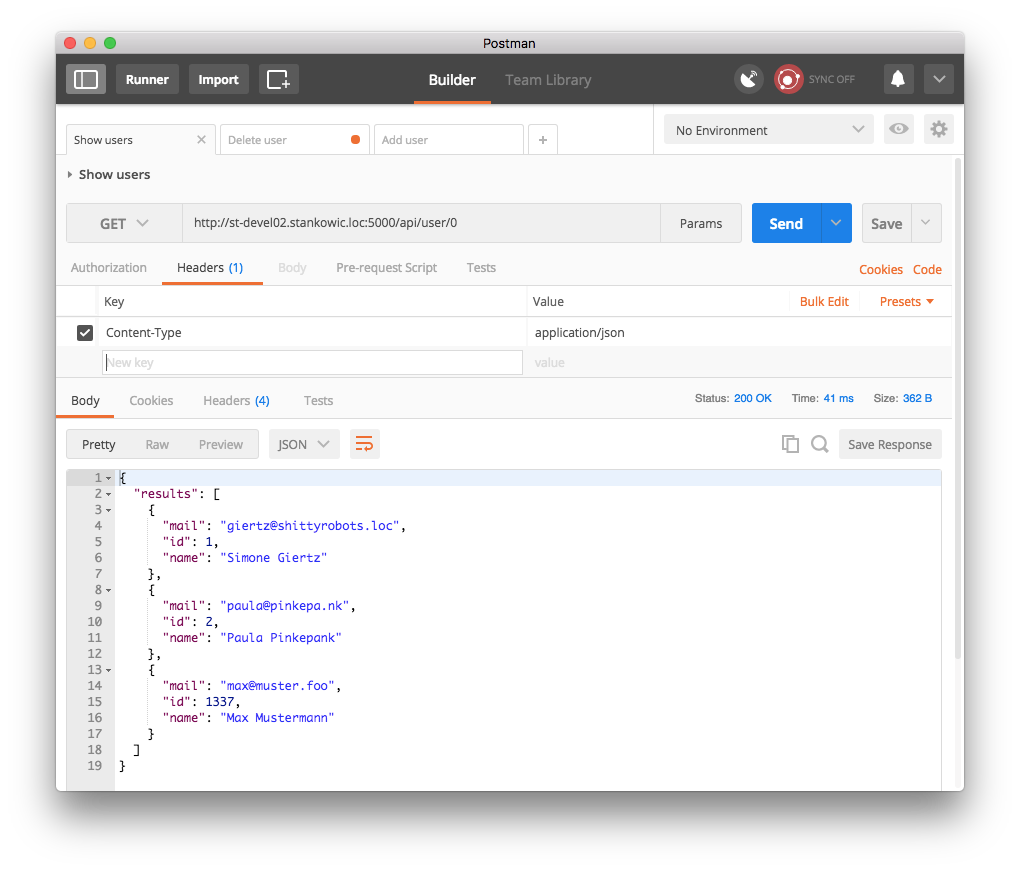
When executing those calls, appropriate answer sections should be displayed in Postman - e.g. when listing an user:
1{
2 "results": [
3 {
4 "mail": "giertz@shittyrobots.loc",
5 "id": 1,
6 "name": "Simone Giertz"
7 }
8 ]
9}
Another example: deleting an user:
1{
2 "message": "SUCCESS",
3 "code": 0
4}
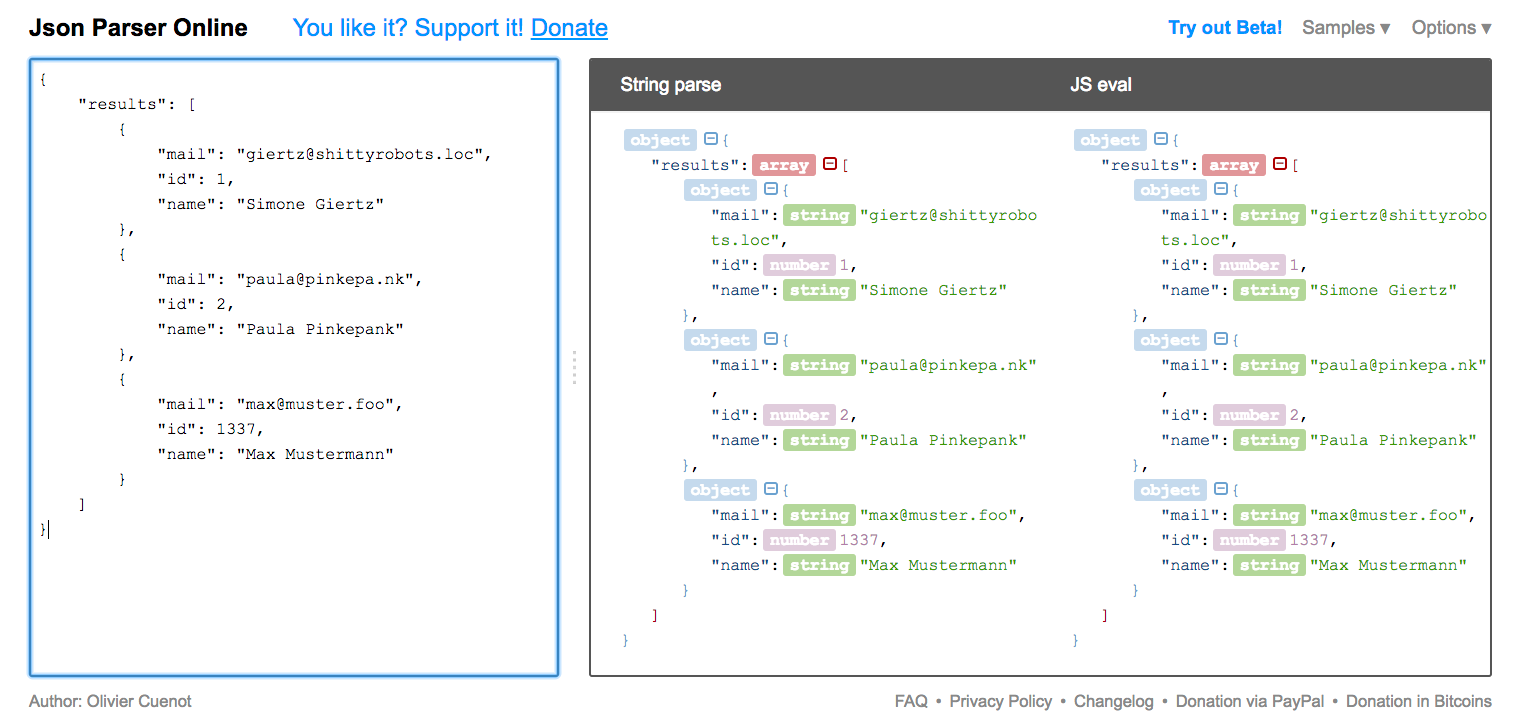
JSON parser
If we have not made any terrible errors, all calls mentioned above will return JSON information. In this example it might be easy to read them - but when developing bigger applications this might not be the case. In this case, it might be a benefit to utilize a graphic JSON parser for troubleshooting purposes. There are plenty of online parsers in the internet, such as JSON Editor Online or JSON Parser Online. If you enter our application response there, you can display values in a graphical manner:
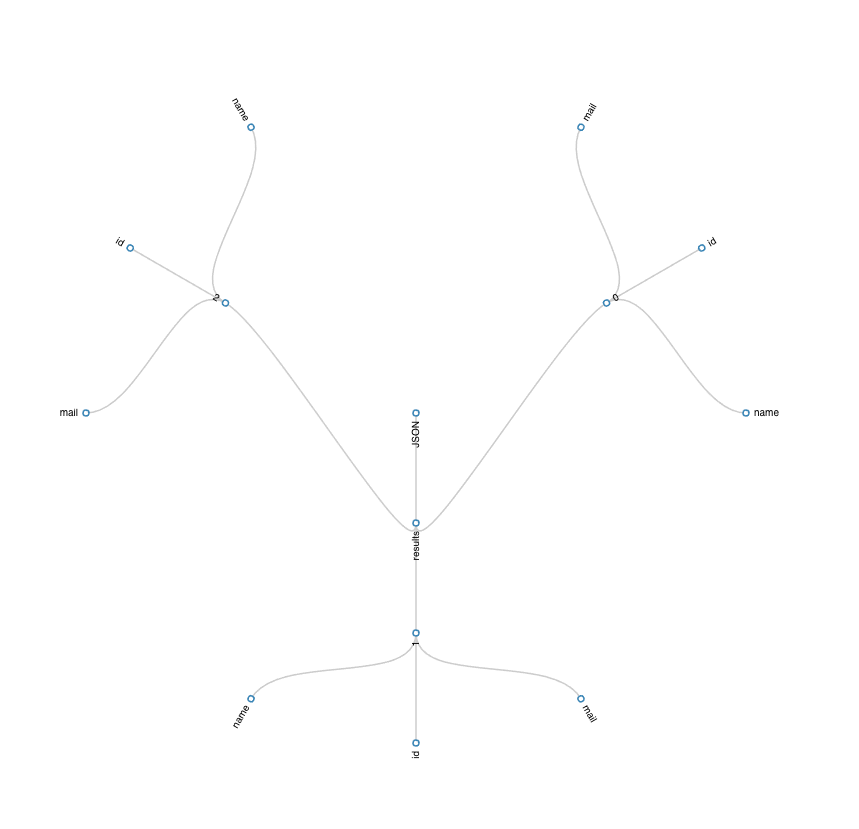
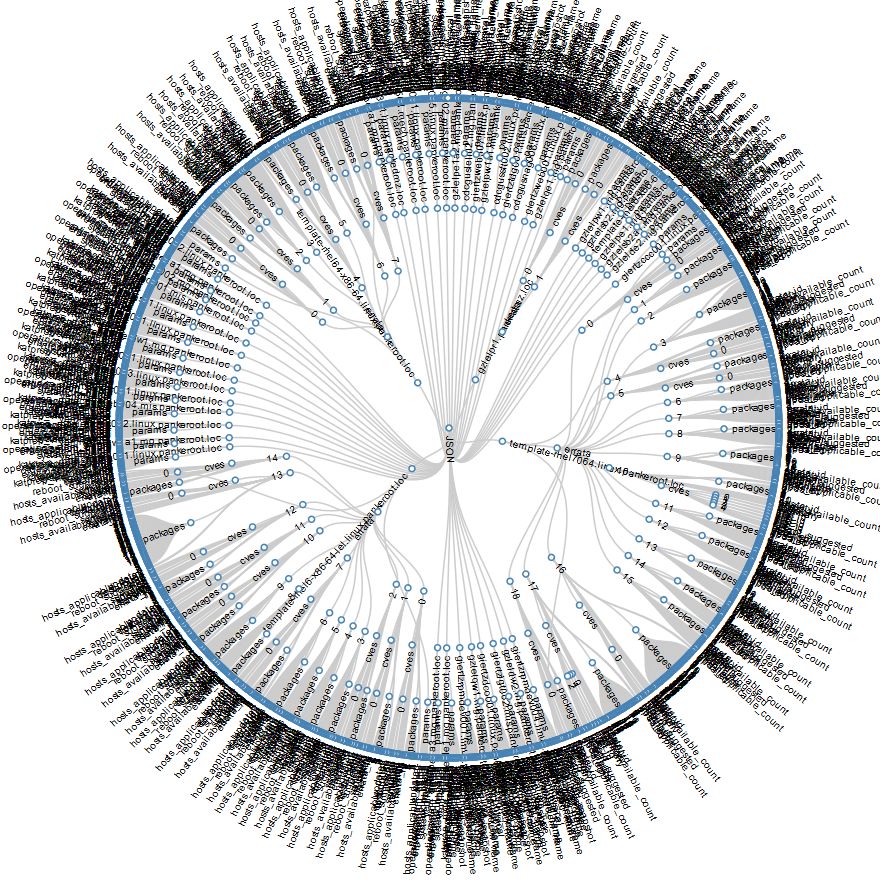
Additional tools such as JSONMate.com also offer the functionality to represent hierarchies - with coming complexity into picture, this might be confusing rather than helpful:
Conclusion
We have just developed our first REST application - hooray! 🙂
Of course there are additional possibilities to improve this application. An idea would be adding more information (address, telephone number,...) or making the application behave more intelligent. Defining the user ID is not necessary from a database perspective as it is an auto-incrementing value - anyhow, the application requires entering an ID.
Swagger is an interesting framework for simplifying creating APIs and clients. Using this framework calls, content and values are defined and Swagger automatically implements the code in Python and a lot of additional programming languages in a parallel manner. Swagger is used in a lot of open source projects and also commercial products (such as VMware vRealize Orchestrator). Maybe I will focus on this in another post.. 🙂