Apache Guacamole, Part 1: Basics and installation under CentOS 7
Readers of my blog know that I have been maintaining a homelab for a couple of years. I really like leveraging products I'm focussing on in my working hours also at home. In other words: I like gaining hands-on experience and learning things from scratch. To access my lab remotely, I have been using a VPN solution in the last couple of years. Unfortunately, you're sometimes travelling in network were outgoing ports are strictly regulated (e.g. only HTTP/HTTPS allowed). Instead of using my VPN solution's default port, I have decided to go for a high port to avoid typical brute force attacks.
Using the default port was not a real choice, so I was looking for alternatives. In a training, I stumbled upon Apache Guacamole that offers just what I need. The utility offers a HTML5 interface that is used to start remote sessions. The following protocols are supported:
- VNC
- RDP
- SSH
- Telnet
The particular connection details and users are stored in one of the following databases:
- MySQL or MariaDB
- PostgreSQL
- Microsoft SQL
There are additional extensions available - e.g. LDAP or two-factor authentication.
Architecture
Guacamole consists of the following components:
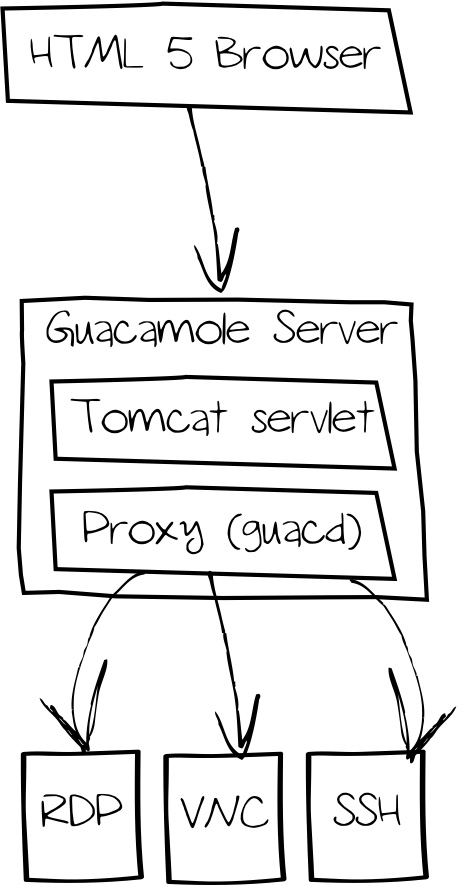
- Guacamole Server (Tomcat Servlet Container)
- Guacamole Proxy Server (
guacd), establishes remote connections - Remots hosts - accessible via protocols above
A Guacamole server can contact multiple proxy servers. Using this, it is possible to access desktops in multiple network segments using one frontend - which might have an impact on a firewall's ruleset design:
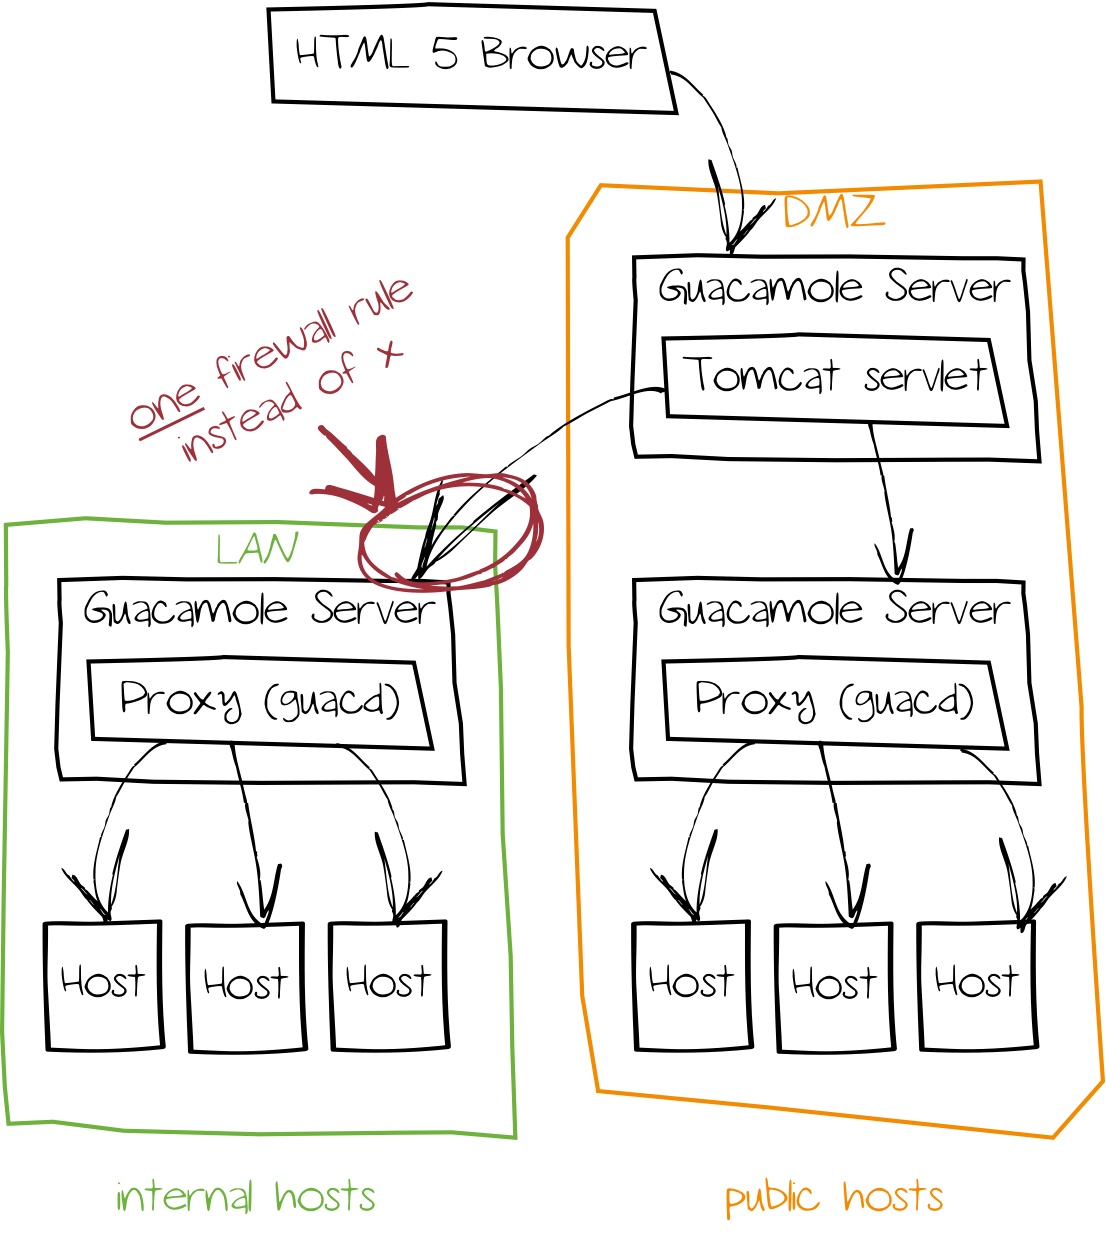
In this example, Guacamole Server and the proxy will be installed on a single system; for the database, MariaDB is used.
Installation
The first step is to install required packages - beside the Tomcat and MariaDB servers, also a MySQL java library and a terminal font are required. Afterwards, Tomcat, MariaDB and the Guacamole proxy servers are configured for autostart:
1# yum install tomcat mariadb{,-server} guacd libguac{,-client*} mysql-connector-java dejavu-sans-mono-fonts
2# systemctl enable tomcat
3# systemctl enable mariadb ; systemctl start mariadb
4# systemctl enable guacd ; systemctl start tomcat
Guacamole server is already available as pre-compiled WAR file (Web Application Archive). Download the file and copy it to /var/lib/tomcat/webapps:
1$ wget 'http://apache.org/dyn/closer.cgi?action=download&filename=guacamole/0.9.14/binary/guacamole-0.9.14.war' -O guacamole-0.9.14.war
2# cp guacamole-0.9.14.war /var/lib/tomcat/webapps/guacamole.war
Before downloading, check whether there is a newer version available!
When starting the Tomcat server, this file is unzipped and installed automatically. Before deploying the application, it is recommended to harden the MariaDB installation:
 1# mysql_secure_installation
 2...
 3Set root password? [Y/n] y
 4...
 5Remove anonymous users? [Y/n] y
 6...
 7Disallow root login remotely? [Y/n] y
 8...
 9Remove test database and access to it? [Y/n] y
10...
11Reload privilege tables now? [Y/n]  y
12
13It is also a good idea to create a dedicated database along with a username and password:
14
15# mysql -u root -p
16> CREATE USER 'pinkepank'@'localhost' IDENTIFIED BY 'password';
17> CREATE DATABASE IF NOT EXISTS guac_db DEFAULT CHARACTER SET utf8 COLLATE utf8_general_ci;
18> GRANT SELECT,INSERT,UPDATE,DELETE ON guac_db.* TO 'pinkepank'@'localhost' IDENTIFIED BY 'password' WITH GRANT OPTION;
19> FLUSH PRIVILEGES;
Please, choose your own database and username and password!
Configuration
The database is empty and needs to be filled before using Guacamole. For this, the guacamole-auth-jdbc module is needed - download it from the website and unzip it:
1$ wget 'http://apache.org/dyn/closer.cgi?action=download&filename=guacamole/0.9.14/binary/guacamole-auth-jdbc-0.9.14.tar.gz' -O guacamole-auth-jdbc-0.9.14.tar.gz
2$ tar xfz guacamole-auth-jdbc-0.9.14.tar.gz
The folder contains database schemas for MySQL, PostgreSQL and Microsoft SQL. Import the schema like that:
1$ cd guacamole-auth-jdbc-0.9.14/mysql
2$ cat schema/*.sql | mysql -u root -p guac_db
Afterwards, the generic MySQL Java module and the authentication extension are copied in their appropriate folders. The extension folder needs to be created first:
1# mkdir -p /usr/share/tomcat/.guacamole/extensions
2# cp /usr/share/java/mysql-connector-java.jar /usr/share/tomcat/lib
3# cp guacamole-auth-jdbc-mysql-0.9.14.jar /usr/share/tomcat/.guacamole/extensions
4# chown root:tomcat -R /usr/share/tomcat/.guacamole
5# chown root:root /usr/share/tomcat/lib/mysql-connector-java.jar
6# restorecon -R /usr/share/tomcat/.guacamole /usr/share/tomcat/lib
The next step is to create a configuration file containing information such as the database connection details:
 1# vi /usr/share/tomcat/.guacamole/guacamole.properties
 2# database settings
 3mysql-hostname: localhost
 4mysql-port: 3306
 5mysql-database: guac_db
 6mysql-username: pinkepank
 7mysql-password: guacpass
 8
 9# additional settings
10mysql-default-max-connections-per-user: 0
11mysql-default-max-group-connections-per-user: 0
Starting Tomcat is the next step - have a look in the log to see whether the file was extracted successfully:
1# systemctl start tomcat
2# less /var/log/tomcat/catalina.out
3...
4INFO: Deployment of web application archive /var/lib/tomcat/webapps/guacamole.war has finished in 86 ms
Afterwards it might be necessary to open a port in your firewall - e.g. using firewall-cmd:
1# firewall-cmd --add-port=8080/tcp
2# firewall-cmd --add-port=8080/tcp --permanent
If you don't want to have direct access to Tomcat and prefer using a Reverse Proxy, you could go for the following Apache configuration snippet:
1ProxyPass /guacamole http://localhost:8080/guacamole
2ProxyPassReverse /guacamole http://localhost:8080/guacamole
To ensure that SELinux is not blocking connections, set the following booleans:
1# setsebool -P httpd_can_network_connect 1
2# setsebool -P httpd_can_network_relay
First sight
Have a look at Guacamole by accessing the URL http://hostname:8080/guacamole.
Of course, you will also need to replace hostname.
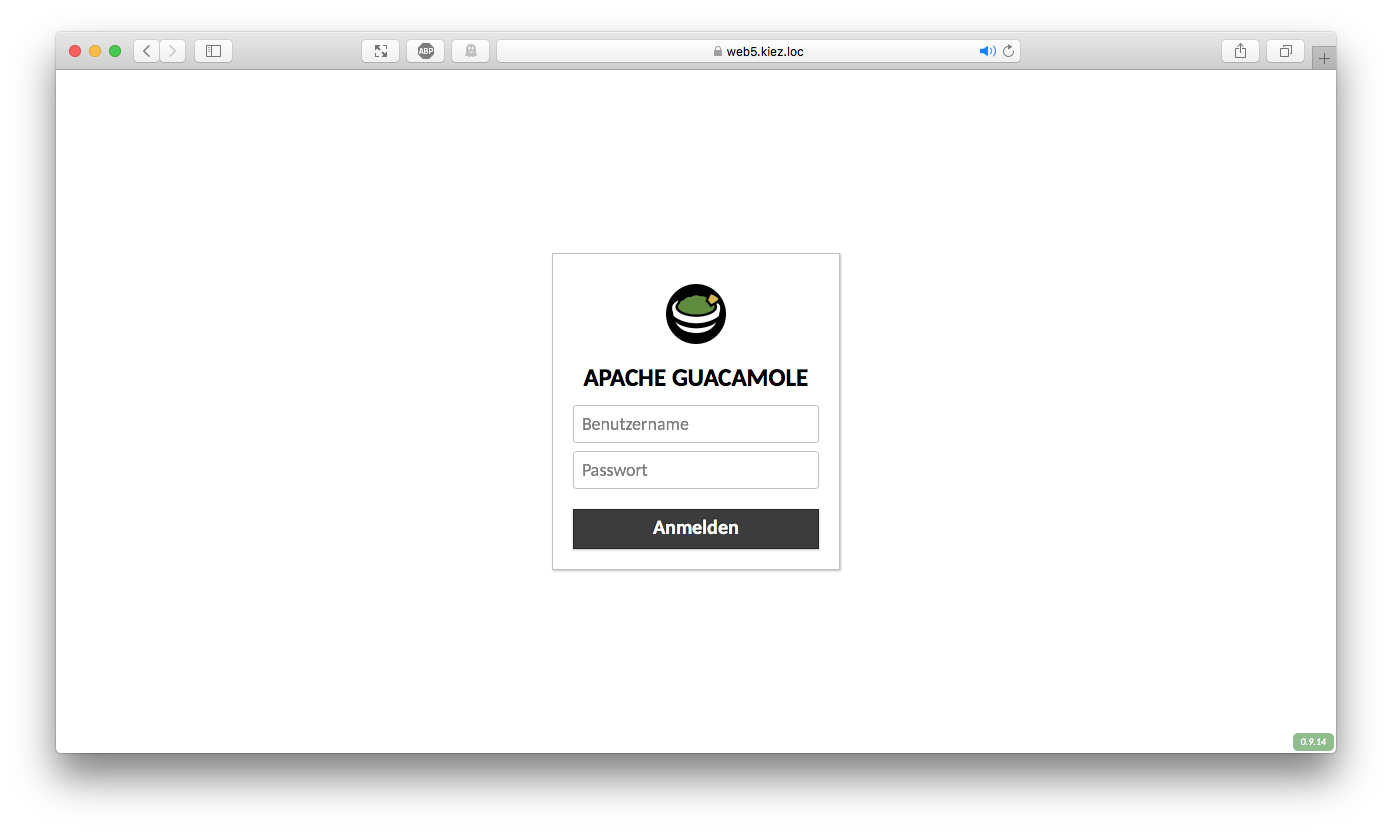
The default credentials are guacadmin - admin, please change them as soon as possible!
On the right, you can expand a menu below your username - adding the appropriate remote desktops is done by clicking Settings, Connections and New Connection:
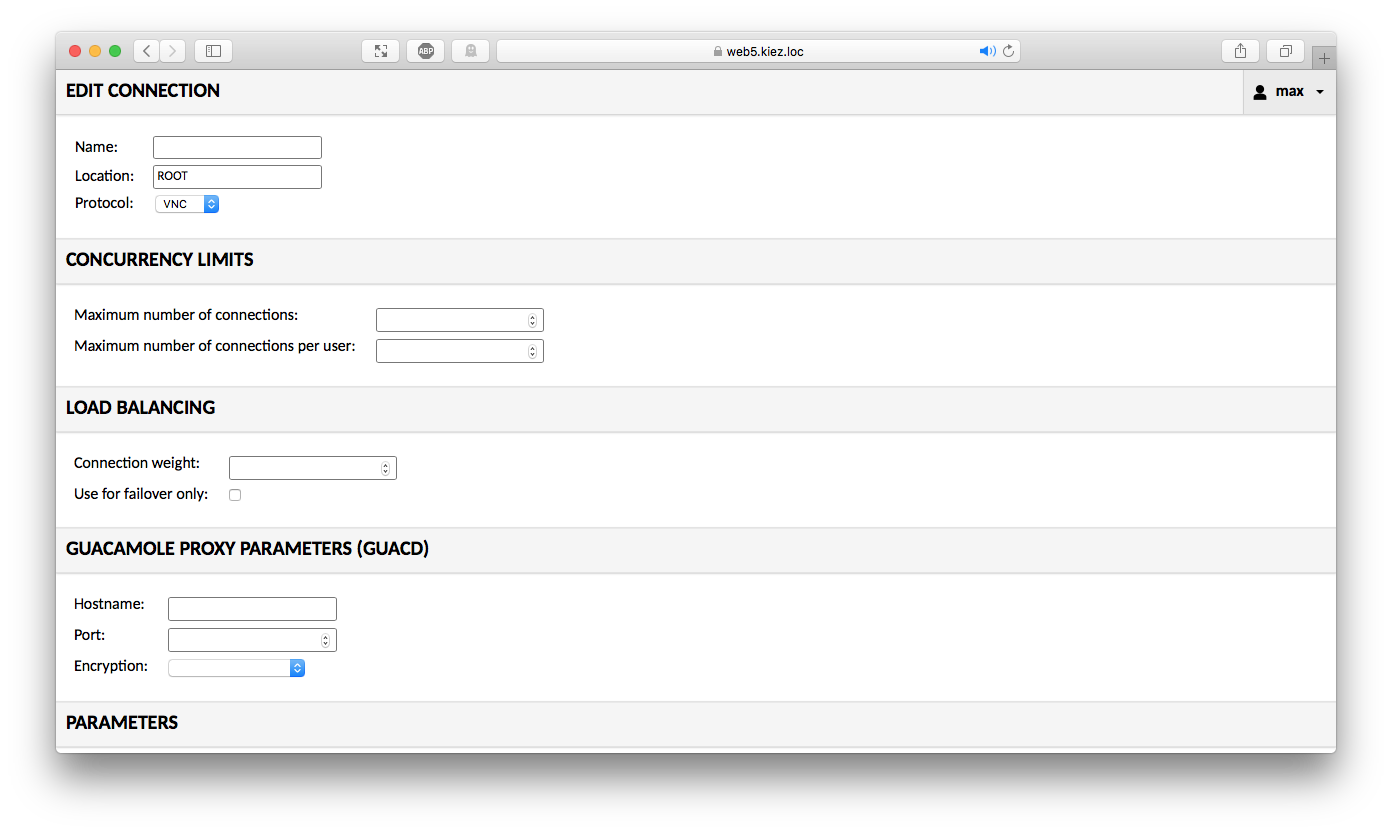
To define a SSH profile, you would need to enter the following information:
- Edit Connection
- Name: Profil name
- Protocol: SSH
- Guacamole Proxy Parameters (GUACD)
- Hostname: localhost
- Port: 4822
- Encryption: Unencrypted (we will have a look at encrypting via SSL/TLS in a later post)
- Parameters
- Network
- Hostname: Hostname or IP address
- Port: 22
- Authentication (optional)
- Username / Password or Private Key
- Network
Beside profiles, it is also possible to create connection groups - e.g. to group connections by location or function.
After configuring your profiles, click Home to see all available connections:
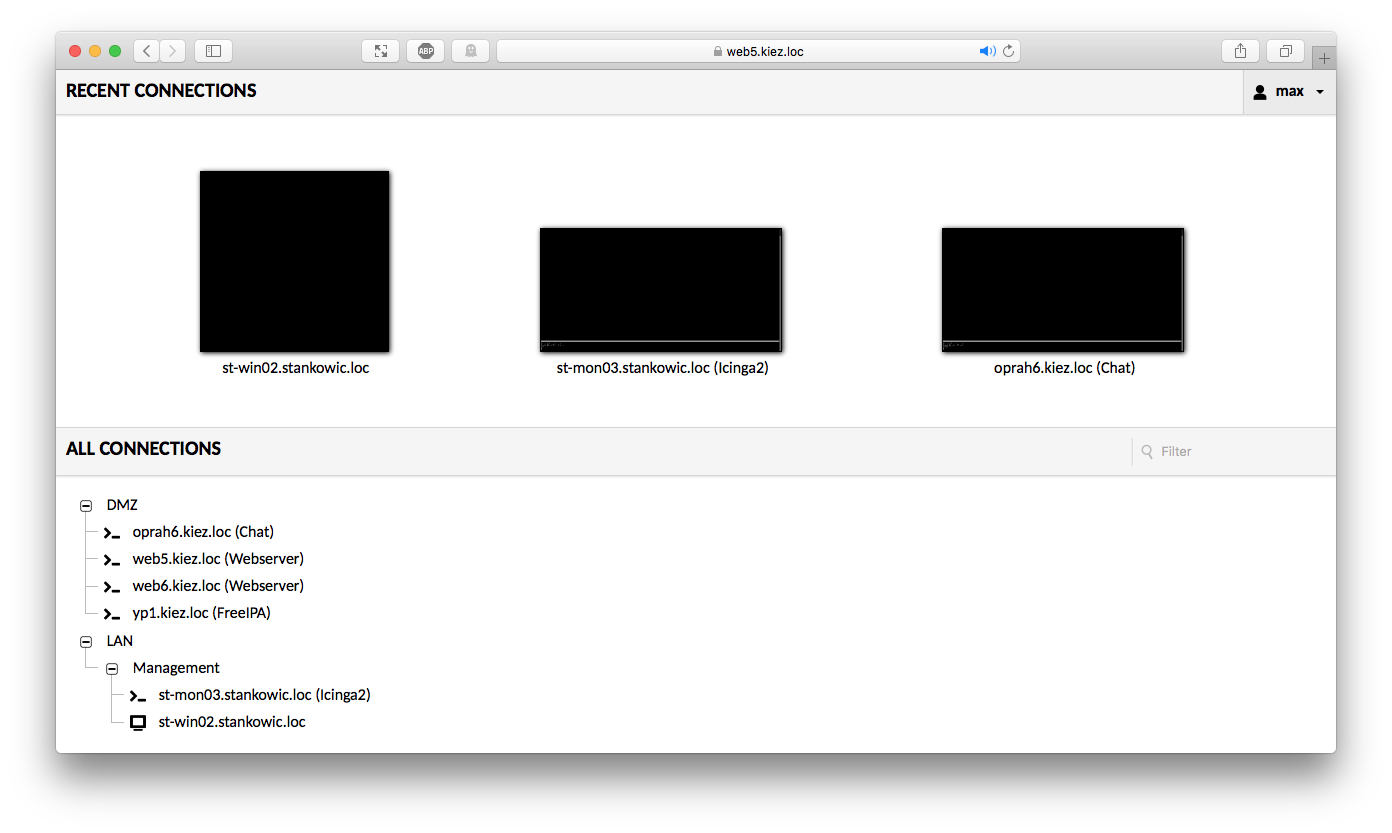
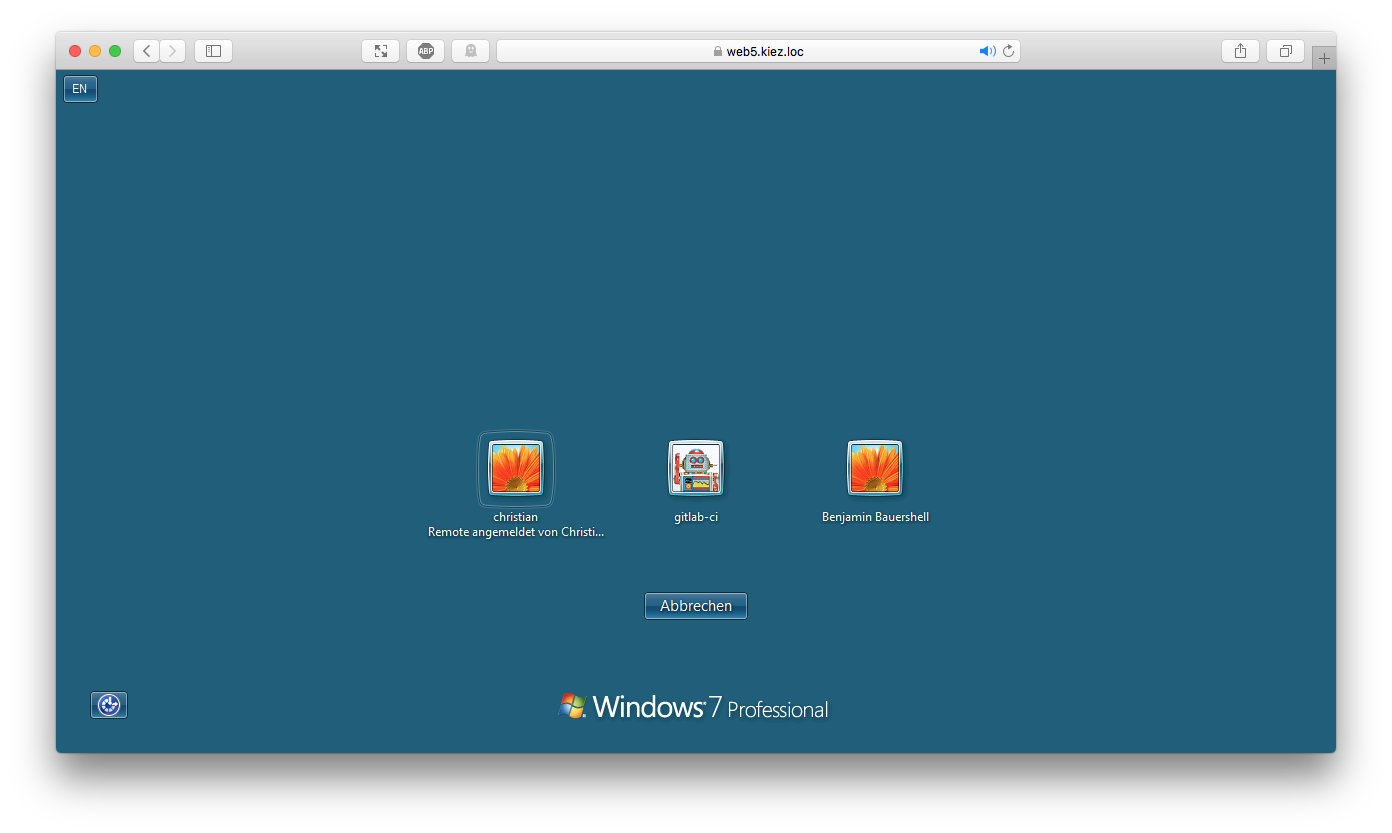
Clicking a profile will result in establishing a connection:
Conclusion
In this article we have been configuring the basic functions of Guacamole - but of course, there are additional things we can focus on. To give you an example, the communication between frontend and proxy server can be hardened by leveraging SSL/TLS. In addition to that, utilising multiple proxy servers might be interested in bigger networks (e.g. DMZ, LAN). The particular remote access protocols support additional parameters we still need to discover. Stay tuned - we will focus these topics in the next part of this blog series! 🙂