DIY voice assistant part 1: Software options and installation
Voice assistants are omnipresent gadgets loved by technophile geeks. They support ad-hoc tasks (set tee timer, announce outdoor temperature) and integrate flawlessly into home automation and other third-party systems. Unfortunately, data privacy is often subordinated with these kind of gadgetry. Using various open-source tools you can build your own simple voice assistant without cloud constraints - which might do the job in the most cases.
Requirements
Offline voice assistants are available in various characteristics - but basically you need to keep in mind that local selfmade-siris can't compete with cloud-based pendants when talking about functionality. The reason for this is simple - commercial products have access to nearly inexhaustible compute power and uncountable user data. Siri, Alexa and other learn from billions of users every day - private assistants need to be content with the family as user basis. Also the compute capacity of a single-board computer is heavily limited in comparison. Recognizing full sentences ("Hey, turn on the radio", "Please turn on the radio") is a complex task - a better way is to leverage simple commands ("Turn on radio").
The question is - what do you want to achieve with a self-made voice assistant? If you wan't to dictate mails, manage calendars or automative comprehensive online researches, you will face complex effort. Self-construction is especially a good option if the amount of planned features is manageable and required functionality does not require too much compute power. In my scenario, the use-cases are simple:
- Read temperature and humidity sensors per room
- Turn on/off power outlets
- Playing online radio
- Checking infrastructure monitoring
- Telling bad jokes
The possibility to integration third-party applications using REST-API without complex programming was important to me. I also wanted to install the software on a Raspberry Pi or a comparable mini computer that can be operated cost-efficiently 24/7.
Open Source options
There are plenty of options - here's a little overview over some tools that I've checked out.
Snips.ai
Snips.ai is or was an Python-based assistant, that combined voice recognition and output. After the installation that required a free developer account, the software could be operated completely offline. For wake words and assigned commands, a machine learning pattern was downloaded in advance. Own logic could be developed and shared with other developers as apps.
Snips.ai was my preference at first sight, until SONOS bought the french company in November 2019 and immediately stopped the developer tools. Previously configured assistants continued to operate, but could not be customized - new devices were bailed out. Thanks for nothing, SONOS.
SOPARE
SOPARE (Sound Pattern Recognition) is another Python project, that reacts to microphone input in real-time while being offline. Words of simple commands need to be recorded individually - after 3 recordings the framework reaches a good hit rate. The framework operated on command-line only - there is no web interface; integrations in other systems need to be programmed. I couldn't find a Wake Word functionality in the documentation - so the application seems to listen permanently. Unfortunately it seems like framework development has stalled - the last git repository commit is 2 years old.
Rhasspy
Rhasspy is also a Python-based voice assistant framework. It supports many languages and integrates flawlessly with a wide range of services for speech recognition and synthesis as well as intent handling. It is also compatible with the tools Home Assistant and Node-RED.
A web-interface is used to configured used frameworks, individual sentences (recognizable fragments) and intents (commands). Also, the assistant can be activated and tested using this interface.
The installation documentation recommends some framework depending on the language - I decided to go for:
- Wake Word: porcupine
- Speech2Text (speech recognition): pocketsphinx
- Text2Speech (voice output): pico-tts
Caution: Some of the alternatives listed in the documentation are cloud-based (e.g. Google WaveNet) or require personalized accounts, which again is an impact on data privacy.
Rhasspy is not able to trigger recognized commands (e.g. announce outdoor temperature) and requires Home Assistant, Node-RED or a MQTT broker for other systems.
Home Assistant
Home Assistant is a framework for home automation with more than 1500 integrations. It primarily focusses on controlling various home devices such as thermostats, power outlets, smart speaker, etc. By reading router, WLAN and Bluetooth interfaces, the it can detect user presence and control connected devices to match personal preferences (e.g. play music, enable heating, etc.). For the Raspberry Pi there is a customized mini operating system (hass.io) that converts the Pi into your home's control centre.
I mainly had a look at Home Assistant because Rhasspy can be connected to it. Unfortunately, the system did not boot on my Raspberry Pi and I was also unsure whether I would be able to compile the drivers needed for the microphone array. In summary, Home Assistant offers way more than I needed for my setup - and therefore I did not start using it.
Node-RED
Node-RED is a tool for developing networked systems in graphical way, e.g. for IoT projects. Program sequences (flow) are designed in a web browser, systems are linked with bricks (node) using standard protocols. The framework supports a wide range of popular protocols such as tcp/udp, MQTT, http/https and WebSocket. On the project website there is also a catalog with expansion modules and pre-built flows. Programm logic can be exported and shared with others using JSON.
The project originally found by IBM is developed in node.js. Individual flow nodes can developed in JavaScript.
Hardware and software selection
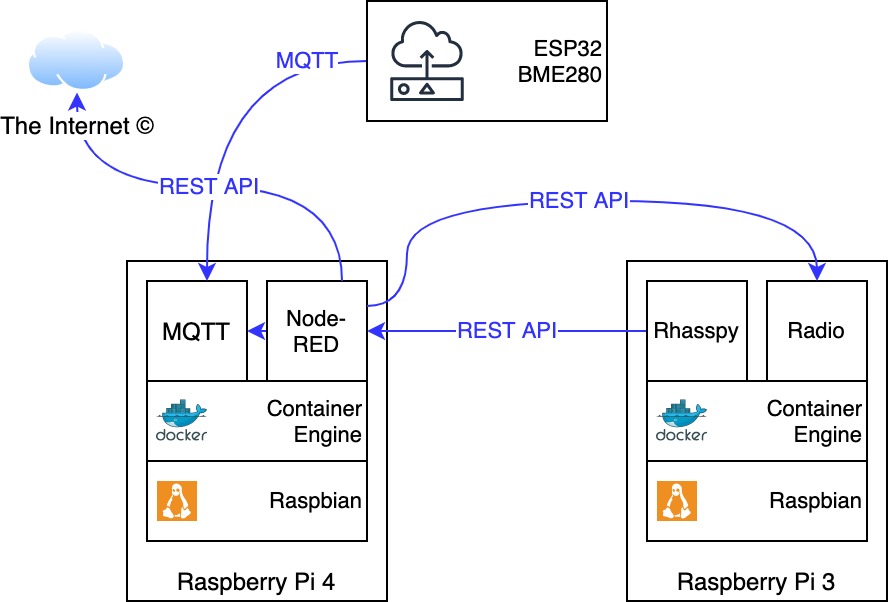
I decided to go for the combination of Rhasspy and Node-RED as they are the foundation of the most functions and integrations. Rhasspy combines all essential components for a offline voice assistant; using Node-RED it is possible to develop comprehensive integrations (temperature sensor, online radio,...) without the need of complex code.
In summary, my setup consists of the following components:
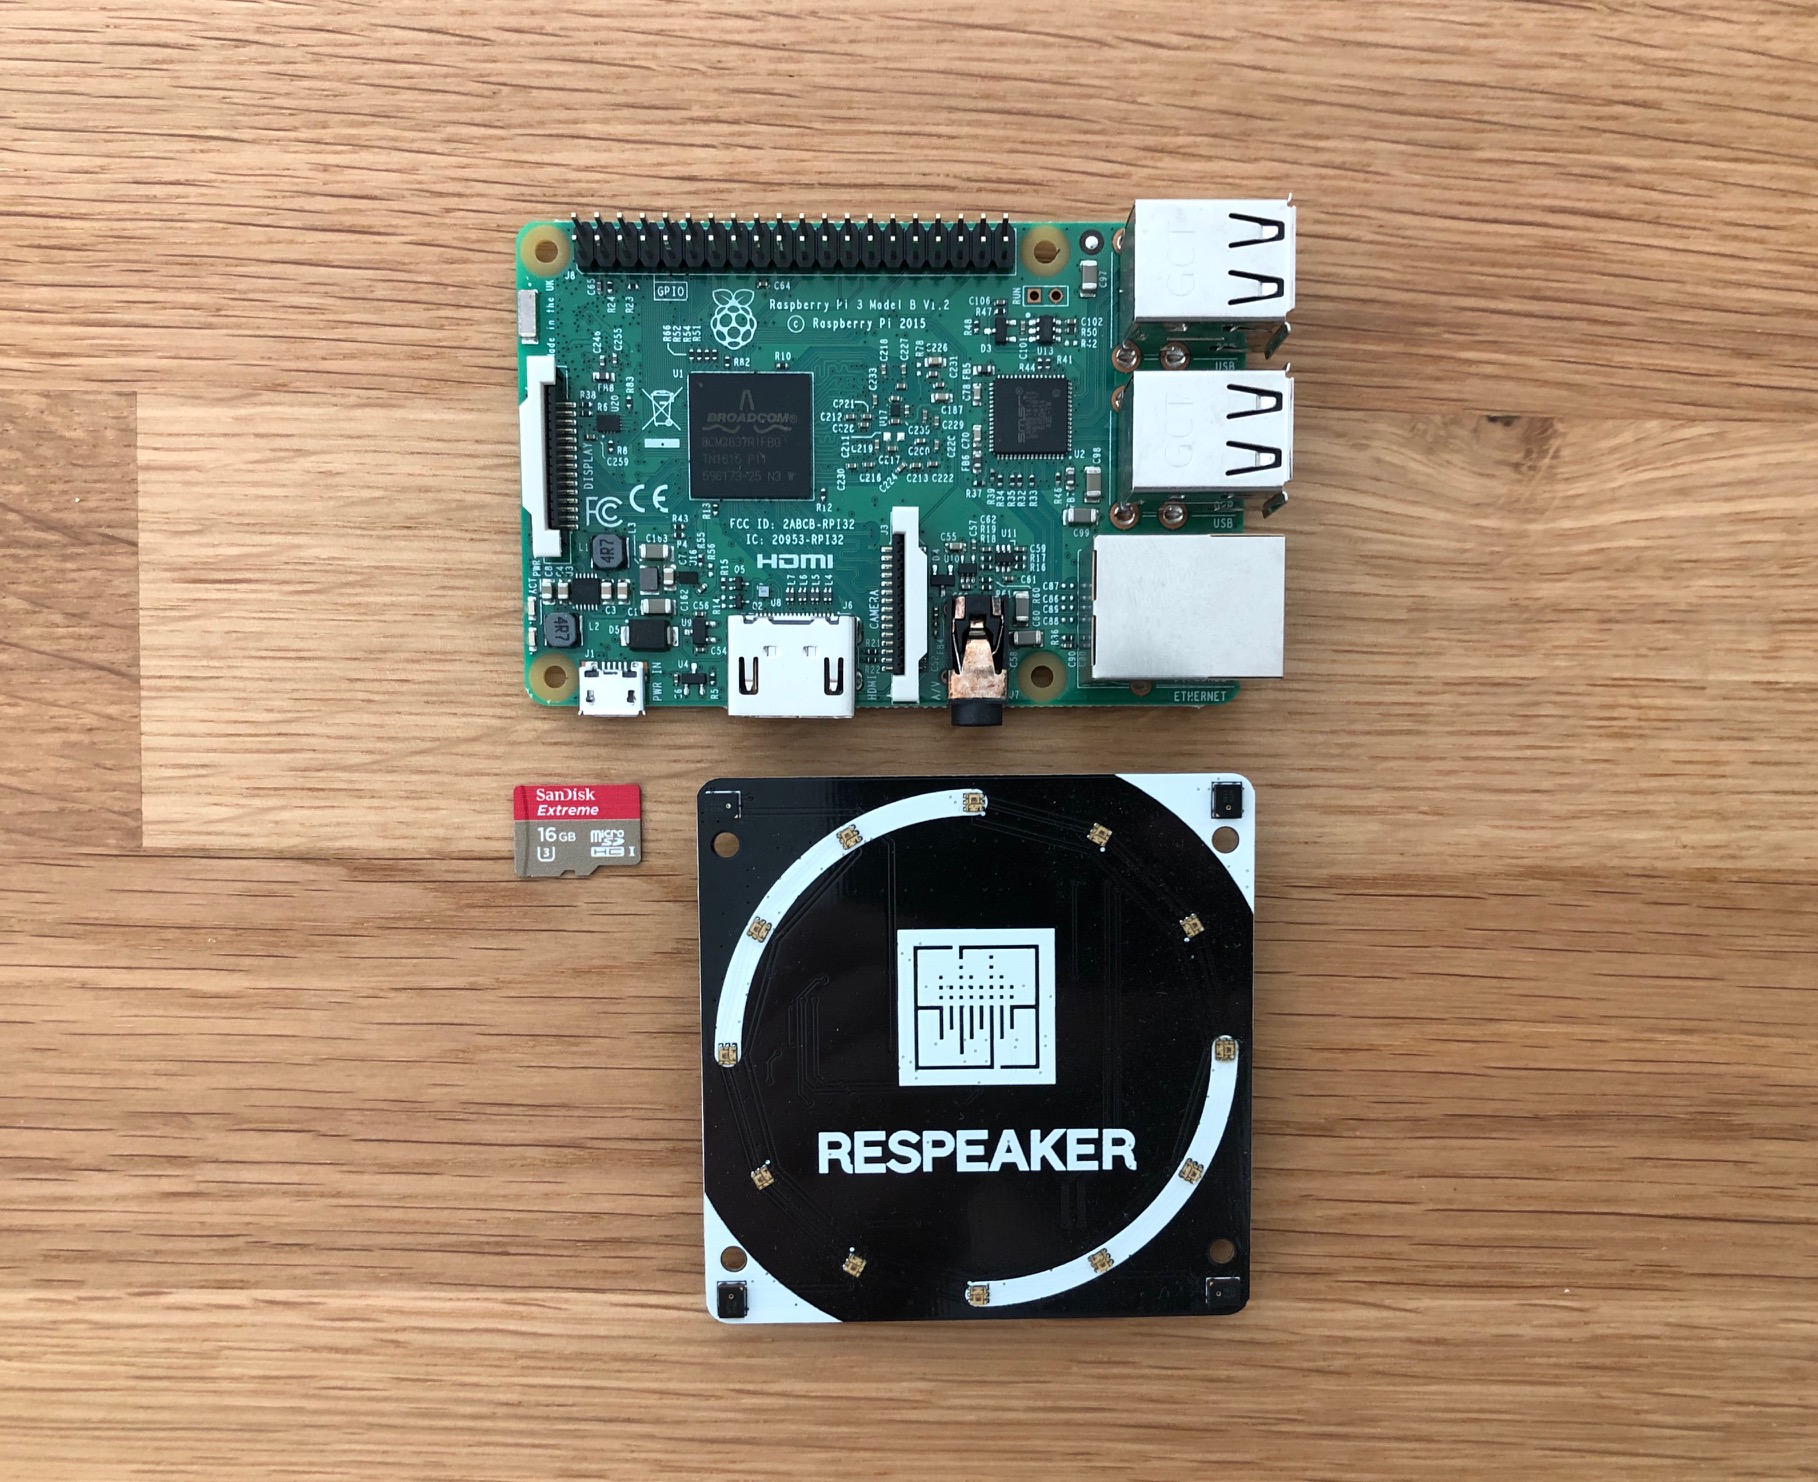
- Raspberry Pi 3
- ReSpeaker 4 Mic Array for Pi (4-channel-microphone and LED strip for animations)
- Raspbian Buster Lite
- Docker Community Edition
- Rhasspy Server image
- Raspberry Pi 4
- Raspbian Buster Lite
- Docker Community Edition
- Eclipse Mosquitto image (MQTT)
- Node-RED image
- additional applications that are linked with Node-RED
- Online Radio container
- Joke API
- Various microcontroller
- ESP32 + Bosch BME280 for monitoring temperature
Of course you can also operate all container combined on a single Raspberry Pi - starting with the Pi 3 enough resources are available, the Zero variants are not recommended. In my case, the Pi 4 was already in use in a cabinet and I had a spare Pi 3. 🙂
Of course, Rhasspy can also be installed natively on Debian or Raspbian in a Virtualenv - but both installation as well as upgrades are not comfortable. Container images are easier to manage in this case. Both projects update their images in a frequent manner so downloading and restarting containers is sufficient to update the applications.
Installation
I won't focus on the installation of Raspbian and Docker CE in this article - for this, you will find plenty of documentations in the internet:
For the microphone there is a driver on GitHub that needs to be compiled:
1# git clone https://github.com/respeaker/seeed-voicecard.git
2# cd seeed-voicecard
3# ./install.sh
This will take up to approximately 20 minutes. During the progress, a specific Kernel version is installed and the modules are compiled. Afterwards you should avoid updating the packages raspberrypi-kernel and raspberrypi-kernel-headers - a way to accomplish this is locking them:
1# apt-mark hold raspberrypi-kernel{,-headers}
I decided to setup the two containers via docker-compose. For this, the following Python modules are needed:
1# pip install docker docker-compose
The appropriate configuration files look like this:
/home/pi/node-red/docker-compose.yml:
 1version: "3"
 2
 3services:
 4  node-red:
 5    container_name: nodered
 6    image: nodered/node-red:latest
 7    ports:
 8      - "1880:1880/tcp"
 9    environment:
10      TZ: 'Europe/Berlin'
11    volumes:
12      - node-red-data
13    restart: unless-stopped
Beside the image, a time zone and TCP port 1880 forwarding is defined. Using this port, the web interface is accessed.
/home/pi/rhasspy/docker-compose.yml:
 1version: "3"
 2
 3services:
 4  rhasspy:
 5    container_name: rhasspy
 6    image: "synesthesiam/rhasspy-server:latest"
 7    ports:
 8      - "12101:12101"
 9    volumes:
10      - "./profiles:/profiles"
11    devices:
12      - "/dev/snd:/dev/snd"
13    command: --user-profiles /profiles --profile de
14    restart: unless-stopped
Here is also a TCP port forwarding for a web interface defined: 12101. In addition, a volume is created for the application configuration. Using the parameter --profile de Rhasspy is configured for the german language.
Afterwards, the two container can be created and started:
1# cd /home/pi/node-red
2# docker-compose up -d
3# cd /home/pi/rhasspy
4# docker-compose up -d
Missing networks might need to be created:
1# docker network create node-red_default
2# docker network create rhasspy_default
The first start
Afterwards, the Node-RED web interface (http://ip-adress:1880) should show an empty overview:
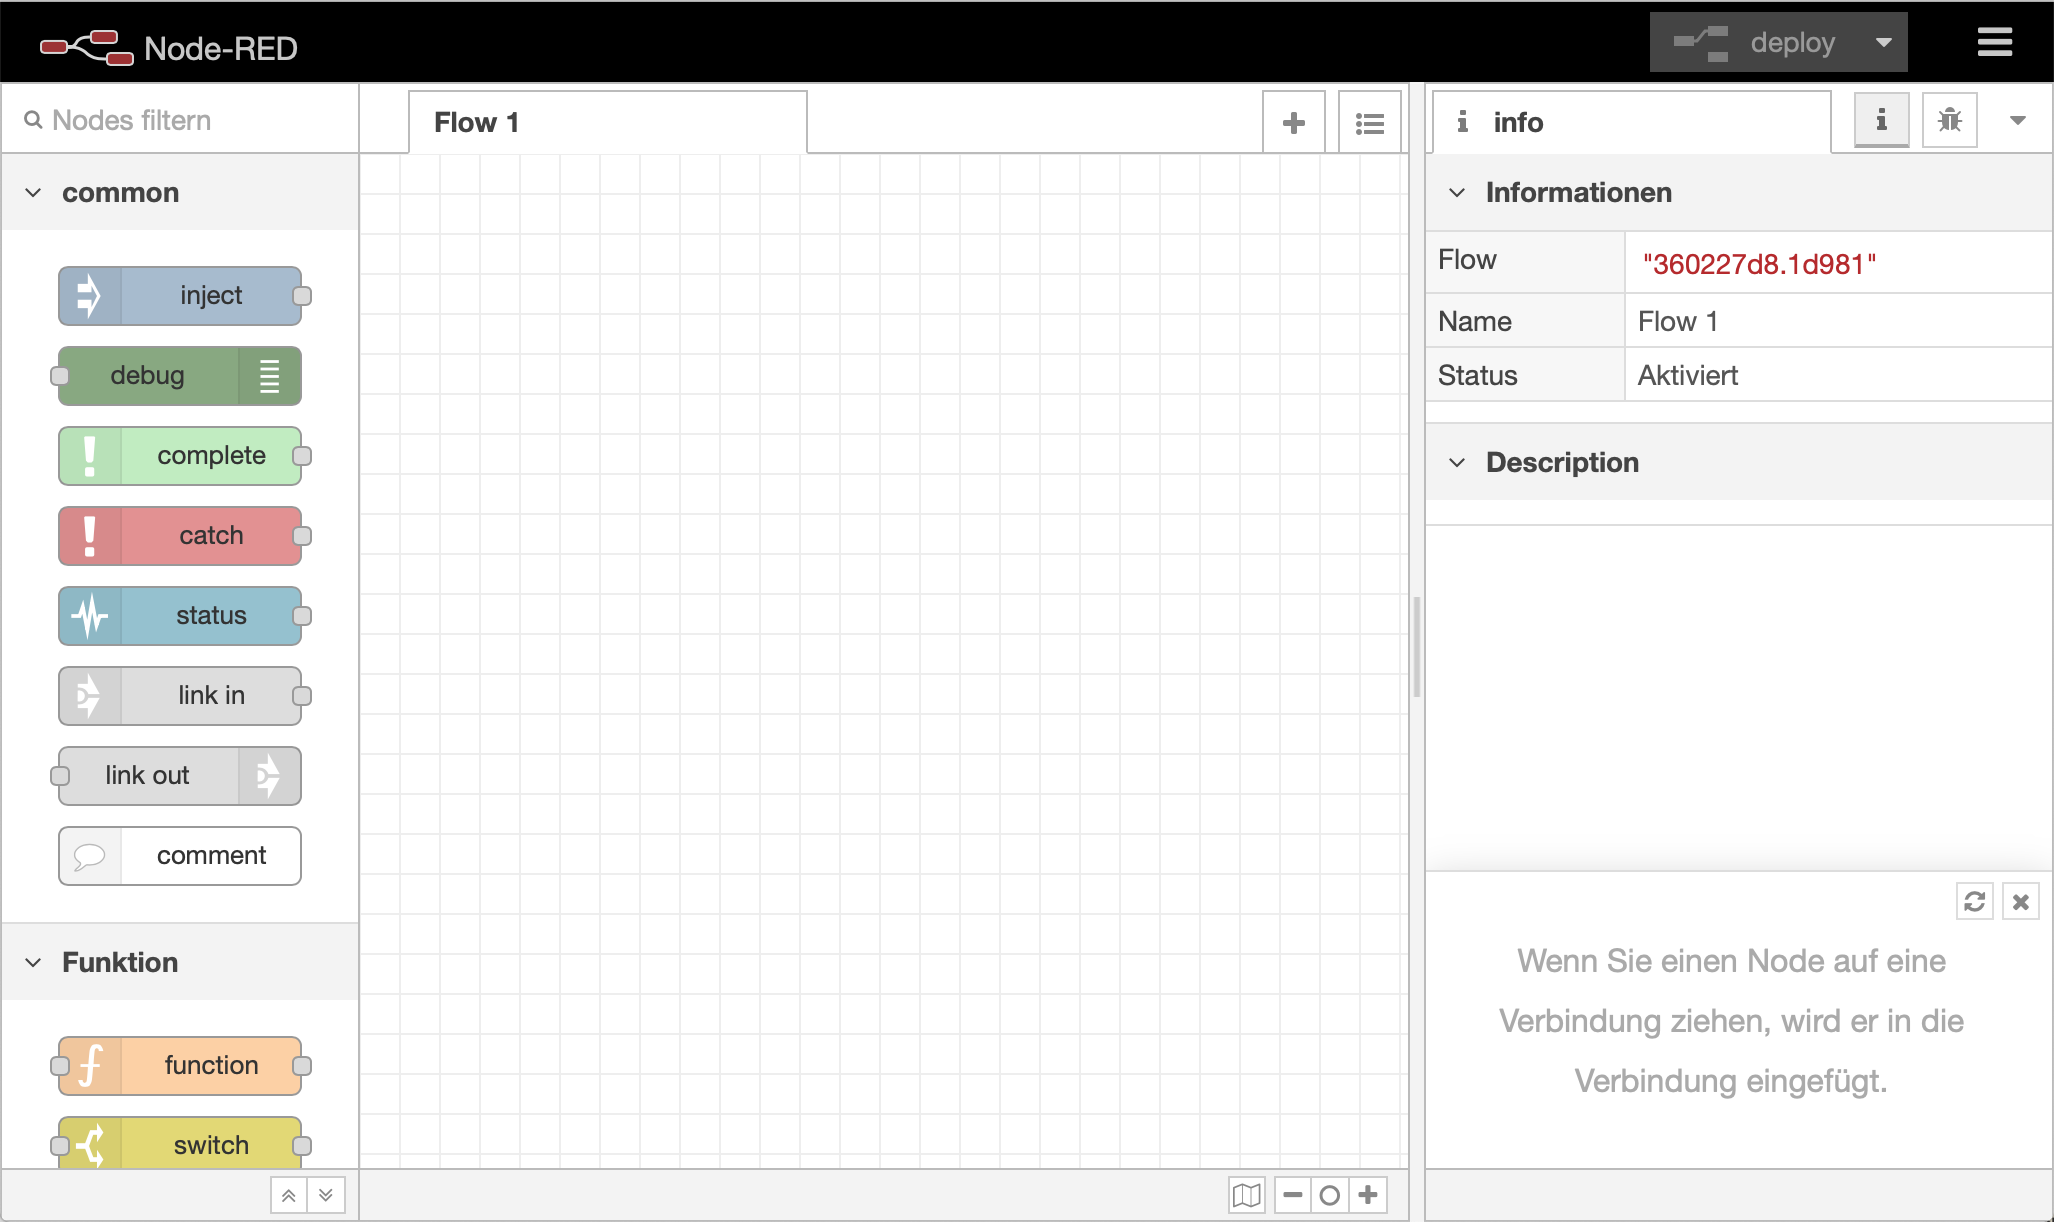
The web interface can be disabled or protected with a password - hints can be found in the official documentation
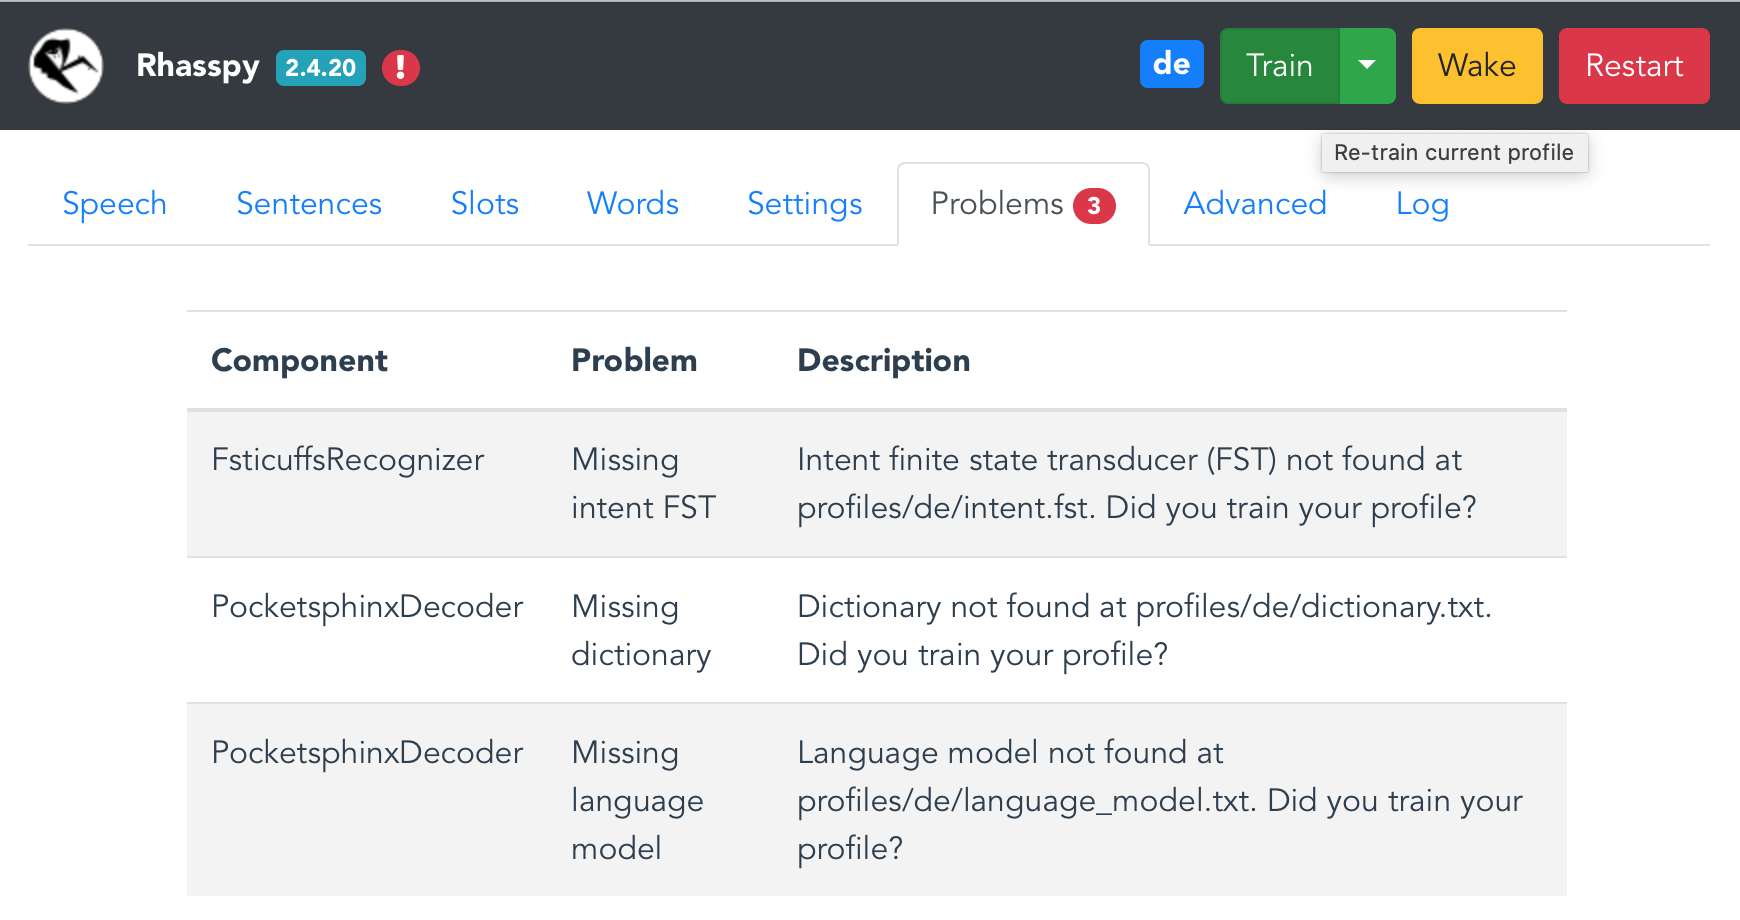
After the first access on the Rhasspy interface (http://ip-address:12101) a message informs about files that need to be downloaded:
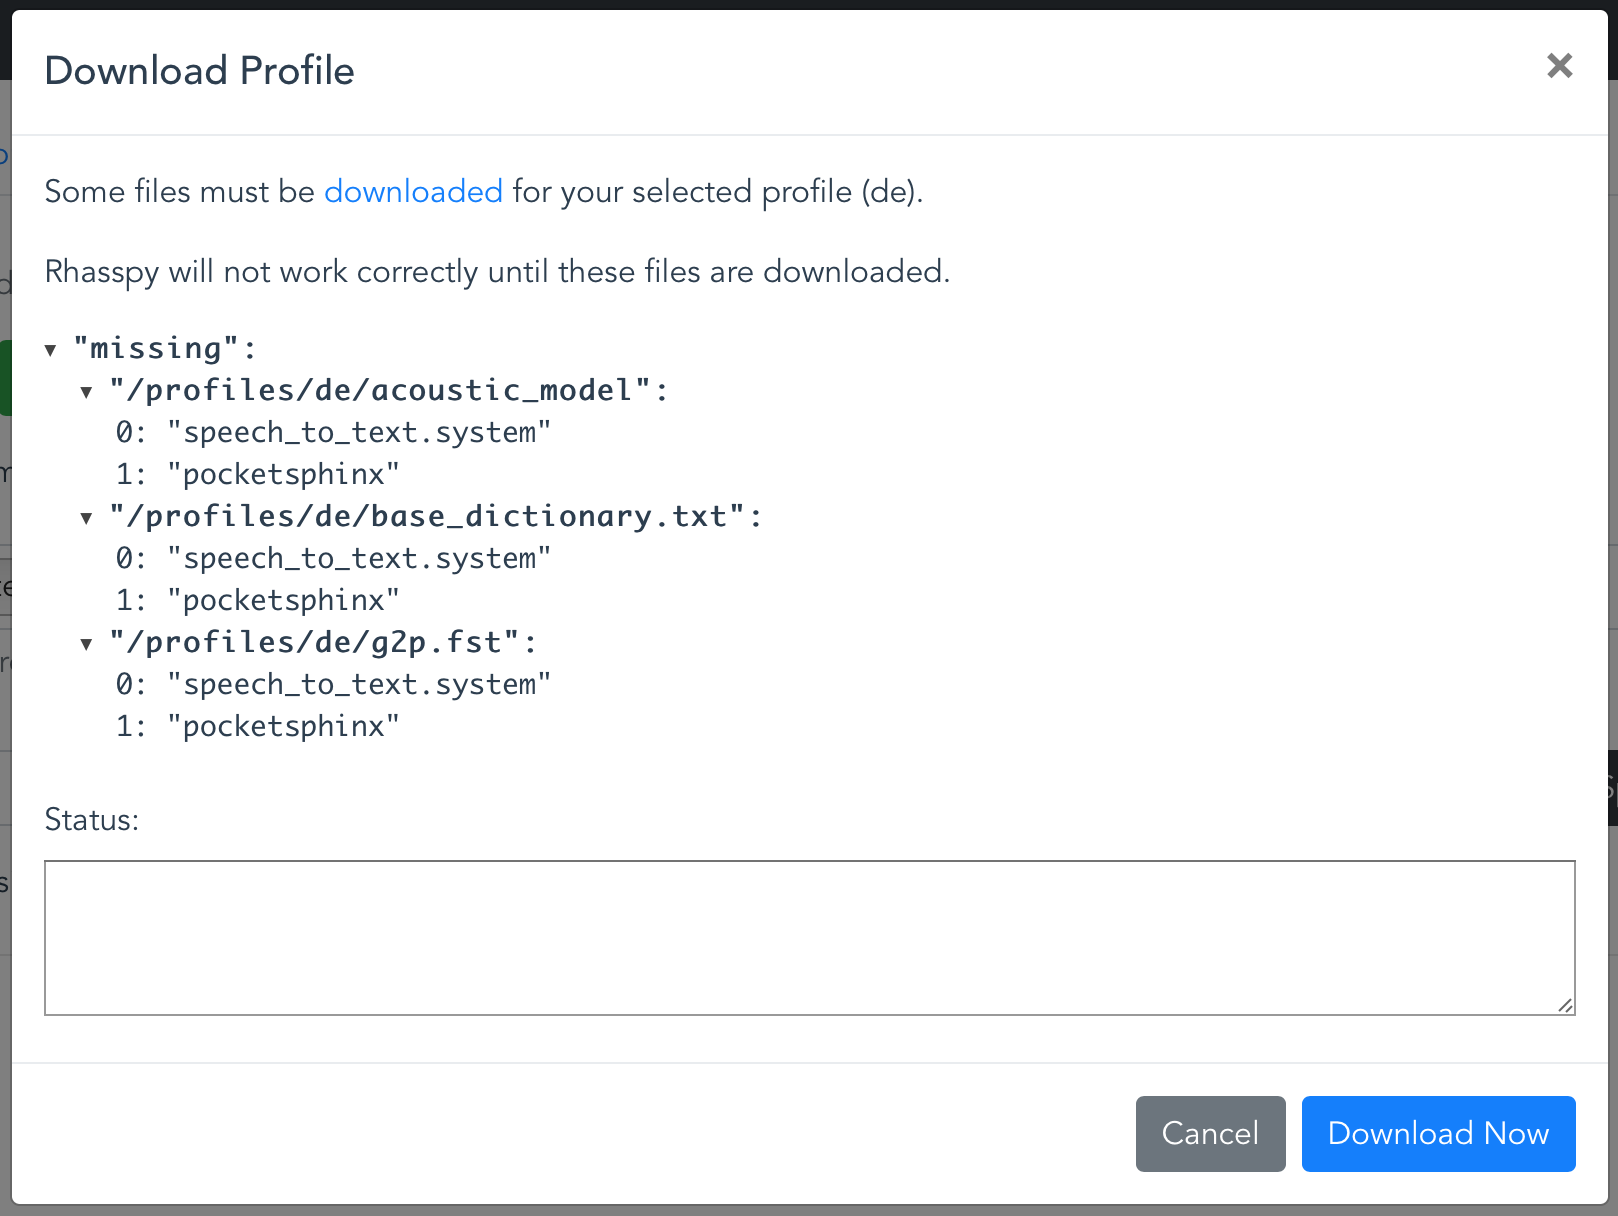
These files are language specific - basically it's about language models and dictionaries. Afterwards, move to the Problems pane - there are additional missing files because the assistant has not been trained, yet - click Train.
Conclusion
In the first part of this series we had a rough look at available software options and installed two basic components for a voice assistant: Node-RED and Rhasspy. The next part will focus on the further setup and linking the required components.